By Carmel Schvartzman
In this post we'll discuss when to use ASP.NET MVC and when to use ASP.NET Web Forms, performing an MVC-WebForms comparison.
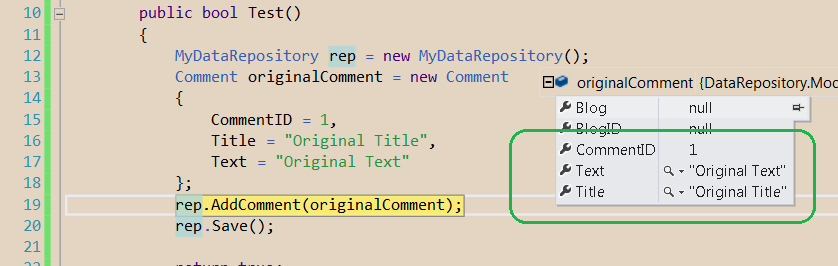
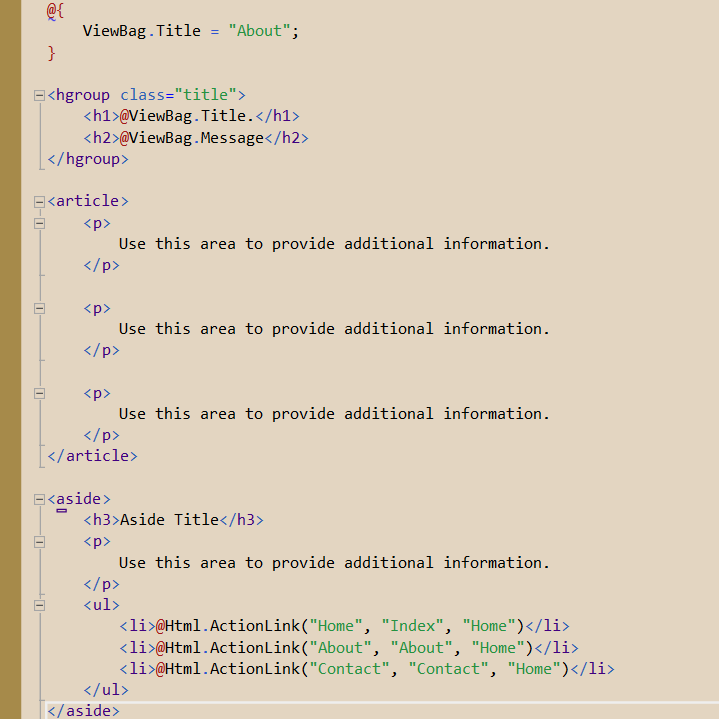
This is an MVC View:
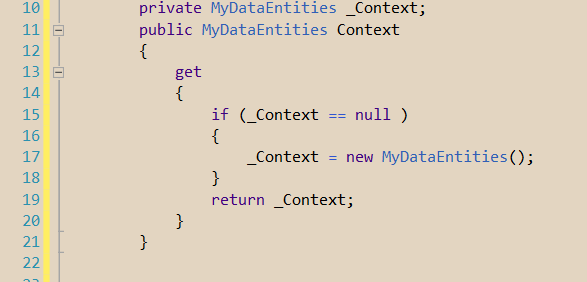
Compare it with the Web Forms markup:

Web Forms are based on pre-built building stones called HTML Controls and Server Controls.
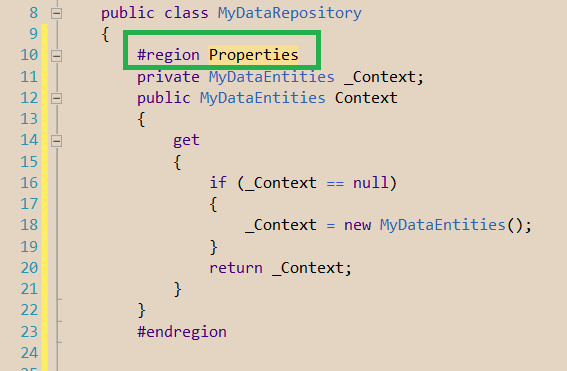
On the other side, MVC is based in the Model-View-Controller Pattern, that is reflected in the MVC folders architecture:

ViewState: exists, and usually is a heavy weight upon rendering HTML markup
Postback: YES
Event-Driven Development: YES
Controls: large library of drag-and-drop pre-built milestones that help you but limite you
SEO: Search Engine Optimization: limited by the pre-built controls
RAD: Rapid Application Development based on a rich variety of HTML and Server Controls
Test-Driven Development: no
ViewState: NO (stateless model)
Postback: NO
Event-Driven: NO
Controls: do not exist: there is complete control on the generated HTML
SEO: Search Engine Optimization: enhanced by the complete control on the generated HTML
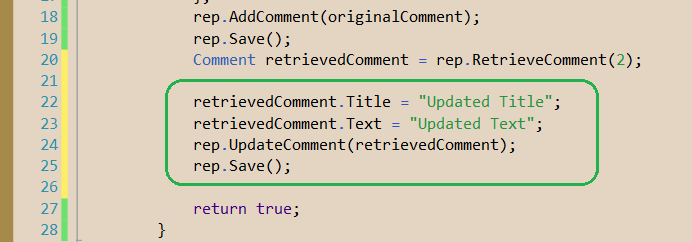
RAD: Rapid Application Development is not the priority
Test-Driven Development: optimized for it
Based on the previous considerations, we could use the following table for deciding between MVC-WEBFORMS:
Following the previous rough considerations, you could consider which ASP.NET development options to use.
That's all!!
Happy programming.....
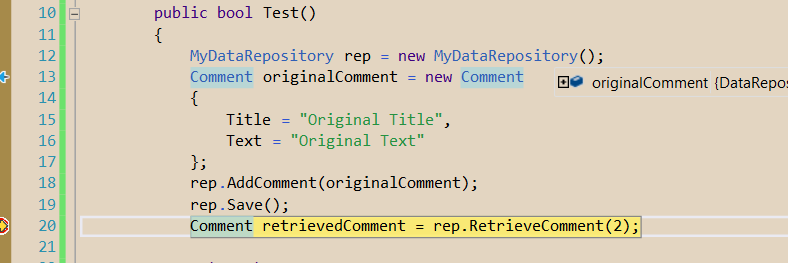
This is an MVC View:
Compare it with the Web Forms markup:
Web Forms are based on pre-built building stones called HTML Controls and Server Controls.
On the other side, MVC is based in the Model-View-Controller Pattern, that is reflected in the MVC folders architecture:
For those who until now have been working with traditional ASP.NET Web Forms, the following remarks about the Web Forms will not be new at all:
Separation between UI Design (HTML) and Application LogicASP.NET Web Forms
ViewState: exists, and usually is a heavy weight upon rendering HTML markup
Postback: YES
Event-Driven Development: YES
Controls: large library of drag-and-drop pre-built milestones that help you but limite you
SEO: Search Engine Optimization: limited by the pre-built controls
RAD: Rapid Application Development based on a rich variety of HTML and Server Controls
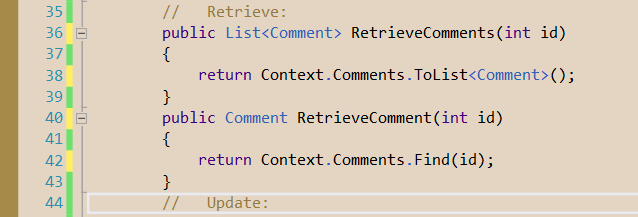
Test-Driven Development: no
ASP.NET MVC
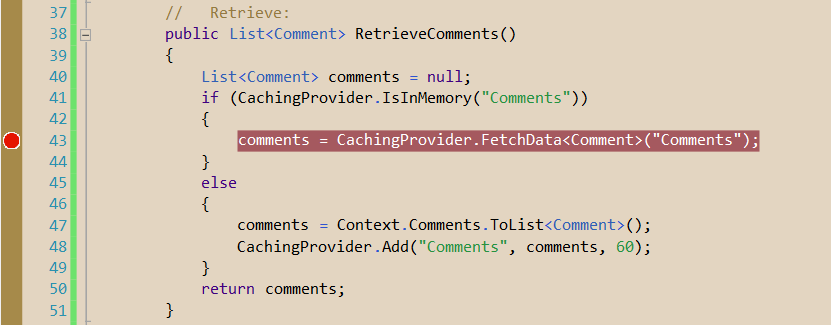
Separation between UI Design (View) - Data Bussiness Logic (Model) - Application Logic (Controller)ViewState: NO (stateless model)
Postback: NO
Event-Driven: NO
Controls: do not exist: there is complete control on the generated HTML
SEO: Search Engine Optimization: enhanced by the complete control on the generated HTML
RAD: Rapid Application Development is not the priority
Test-Driven Development: optimized for it
Based on the previous considerations, we could use the following table for deciding between MVC-WEBFORMS:
Needs
|
MVC
|
Web Forms
|
|
SEO optimizations
|
YES
|
NO | |
Development Speed
|
NO
|
YES | |
Control over rendered HTML
|
YES
|
NO
|
|
Intranet Applications
|
NO
|
YES
|
|
Internet Applications
|
YES
|
MAYBE
|
|
Test-Driven Development
|
YES
|
NO | |
HTML5 skills
|
YES
|
NO
|
|
Following the previous rough considerations, you could consider which ASP.NET development options to use.
That's all!!
Happy programming.....
כתב: כרמל שוורצמן