By Carmel Schvartzman
In this tutorial we'll learn how to create a Data Repository in ASP.NET MVC 4.
The Data Repository is a class which tries to implement the Repository Pattern. This software pattern was designed in order to access, cache in memory and persist in the database the application data. That means, the Repository will fetch the data ONLY IF IT'S NOT AVAILABLE IN MEMORY. Thus the repository will support all CRUD operations (Create Retrieve Update Delete) enhancing a clear separation between data domain and database.
There are, however, Repository implementations with no use of caching. The caching only stands to avoid unnecesary round trips to the SQL server. But when scalability of the sites is on the stage, may be we don't want to choke our web server's memory. Then, caching is not only redundant, but also dangerous as a waste of the web server resources.
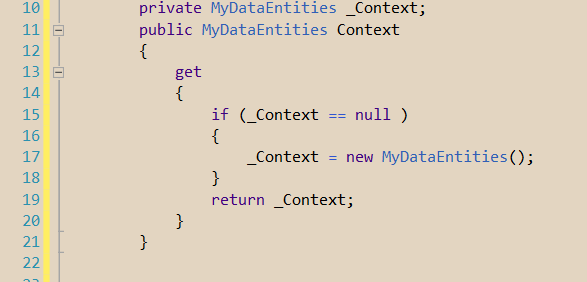
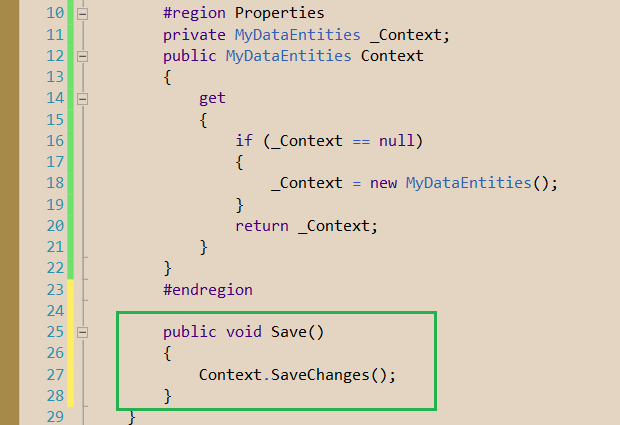
Also add a null check to be sure your DbContext is there:
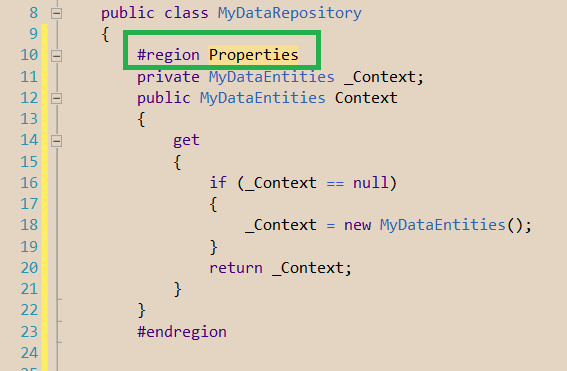
Enclose the properties in a region:
Take a look at the DbContext: you'll see that the Blog and Comment entities are represented by generic collections with a type DbSet<> :
DbSet class provides the CRUD (Create Retrieve Update Delete) functionality we'll need to persist data changes to the database:
The first method we'll add to our Repository will be the Save method. We separate this functionality so then we could make several changes all together and, just when done, we'll call the Repository Save method:
Next, we'll add all CRUD functionality, as follows:

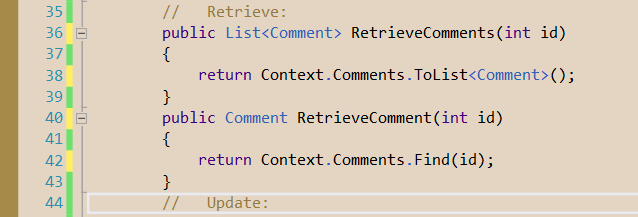
Finally, add the Retrieve functionality also for ALL the Comments and for just ONE selected Comment:
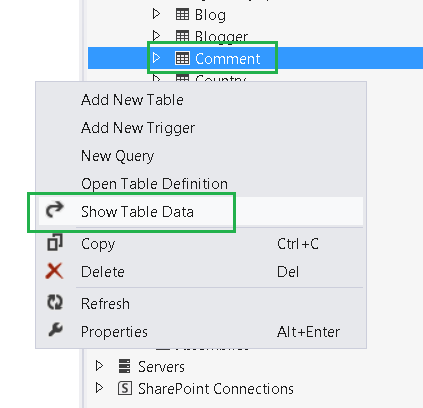
Now, let's check our Repository. On the server view, check the Comments table:

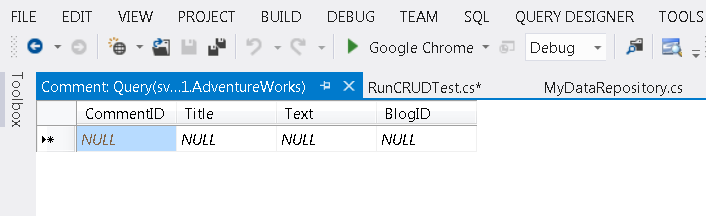
Open the table contents, and clear them:
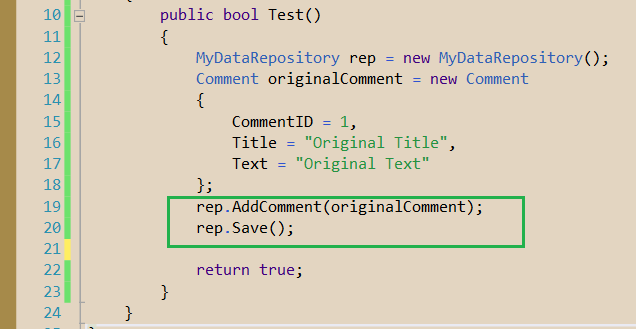
Now, create a Testing class to run tests against the Repository. Inside the class, instantiate the Repository and create a new Comment:

Next, call the Repository's AddComment() method, and Save() it all:
Finally, in the HomeController make a call to our Test class:

Build and debug the MVC application:
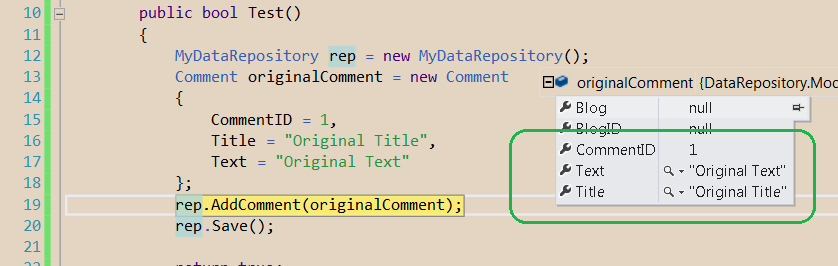
As you can see, the original Comment has been instantiated:
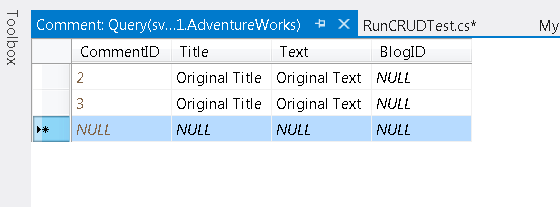
When finished the run, refresh the Comments table:
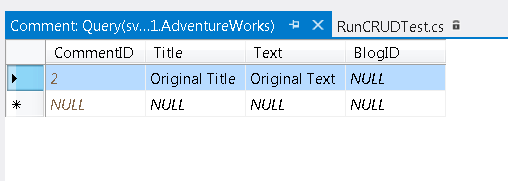
The new record has been persisted by the Repository to the database.
Do it all again, adding the Retrieve part of the testing:
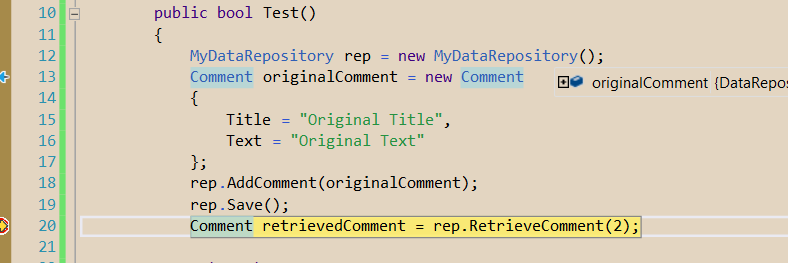
We get the Comment with CommentID = 2, as required:

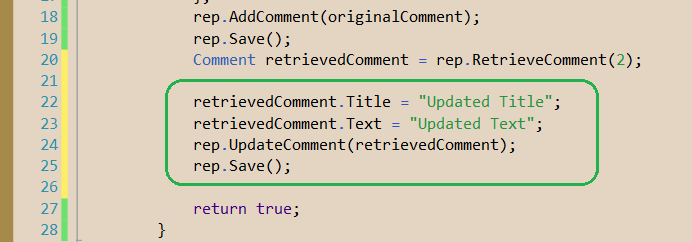
Finally, test the Update method of the Repository, adding the code to change the Comment data:
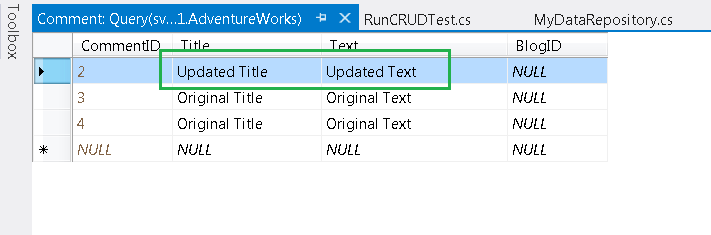
Check the Comments table, which by now shall look like this:
We are updating the fields of the Comment with ID = 2. Build and run, and check the Comments table again to see the changes:
We've built a complete Data Repository with support for all CRUD operations.
That's all!!
Happy programming.....
The Data Repository is a class which tries to implement the Repository Pattern. This software pattern was designed in order to access, cache in memory and persist in the database the application data. That means, the Repository will fetch the data ONLY IF IT'S NOT AVAILABLE IN MEMORY. Thus the repository will support all CRUD operations (Create Retrieve Update Delete) enhancing a clear separation between data domain and database.
There are, however, Repository implementations with no use of caching. The caching only stands to avoid unnecesary round trips to the SQL server. But when scalability of the sites is on the stage, may be we don't want to choke our web server's memory. Then, caching is not only redundant, but also dangerous as a waste of the web server resources.
In this tutorial we'll add Repository functionality (no caching) to a new ASP.NET MVC 4 app.
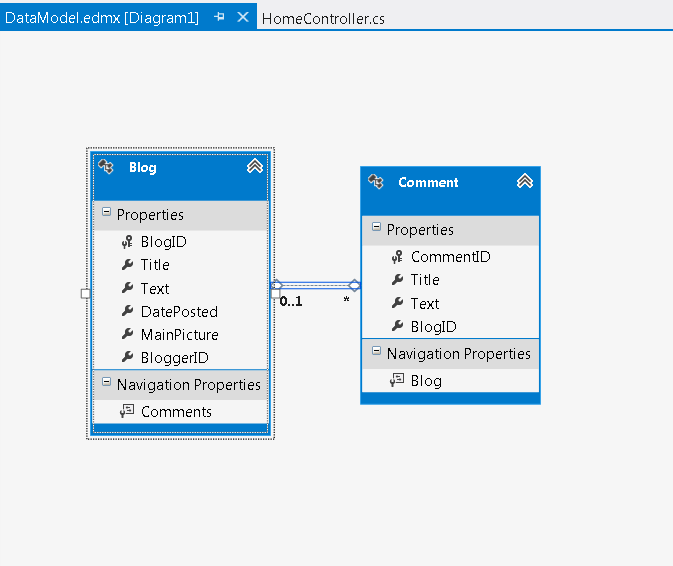
Let's say we have an MVC internet application with an Entity Data Model mapped to an SQL server database. This EDM maps just two entities: Blog and Comment:
Our Repository will be added to the Model folder, which holds all the bussiness logic of the MVC application. Therefore focus the Model folder and create a new class:
Next, we'll create our Data Context, using the class created by the Entity Framework, inheriting DbContext: this class will be located under the Entity Data Model .edmx node: just open it until you see the XXX.Context.cs file:

open it to see the name of your data context class which inherits from DbContext:
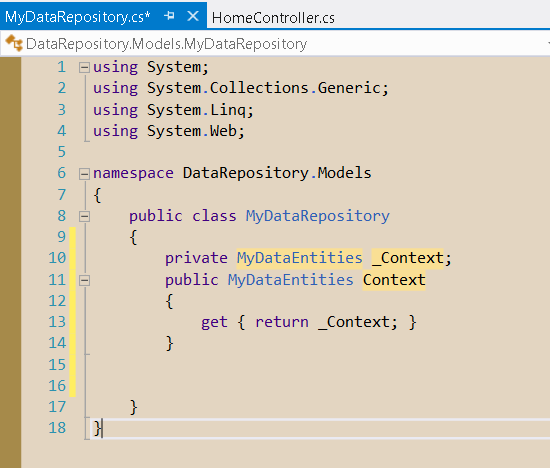
This is your Data context and you'll add it to the Repository:
Let's say we have an MVC internet application with an Entity Data Model mapped to an SQL server database. This EDM maps just two entities: Blog and Comment:
Our Repository will be added to the Model folder, which holds all the bussiness logic of the MVC application. Therefore focus the Model folder and create a new class:
Next, we'll create our Data Context, using the class created by the Entity Framework, inheriting DbContext: this class will be located under the Entity Data Model .edmx node: just open it until you see the XXX.Context.cs file:
open it to see the name of your data context class which inherits from DbContext:
This is your Data context and you'll add it to the Repository:
Also add a null check to be sure your DbContext is there:
Enclose the properties in a region:
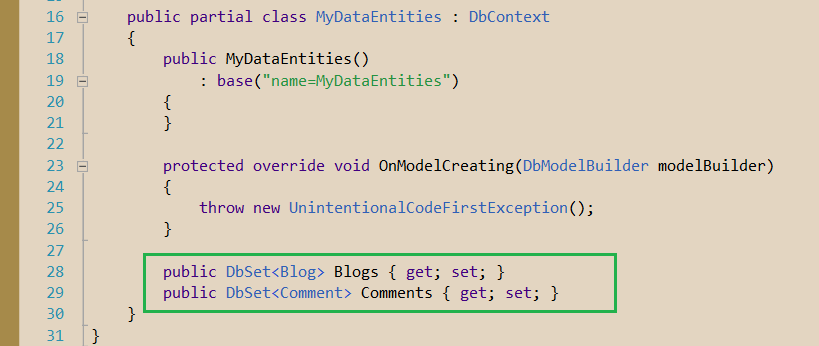
Take a look at the DbContext: you'll see that the Blog and Comment entities are represented by generic collections with a type DbSet<> :
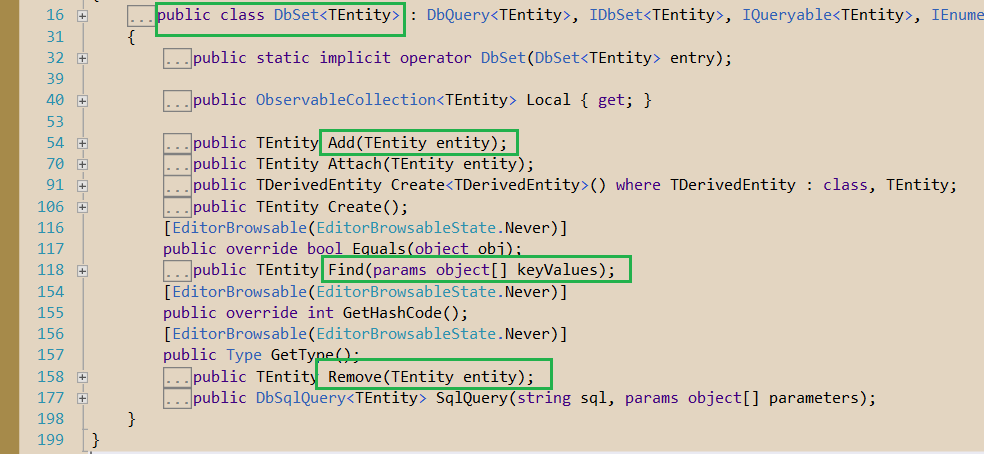
DbSet class provides the CRUD (Create Retrieve Update Delete) functionality we'll need to persist data changes to the database:
The first method we'll add to our Repository will be the Save method. We separate this functionality so then we could make several changes all together and, just when done, we'll call the Repository Save method:
Next, we'll add all CRUD functionality, as follows:
Finally, add the Retrieve functionality also for ALL the Comments and for just ONE selected Comment:
Now, let's check our Repository. On the server view, check the Comments table:
Open the table contents, and clear them:
Now, create a Testing class to run tests against the Repository. Inside the class, instantiate the Repository and create a new Comment:
Next, call the Repository's AddComment() method, and Save() it all:
Finally, in the HomeController make a call to our Test class:
Build and debug the MVC application:
As you can see, the original Comment has been instantiated:
When finished the run, refresh the Comments table:
The new record has been persisted by the Repository to the database.
Do it all again, adding the Retrieve part of the testing:
We get the Comment with CommentID = 2, as required:
Finally, test the Update method of the Repository, adding the code to change the Comment data:
Check the Comments table, which by now shall look like this:
We are updating the fields of the Comment with ID = 2. Build and run, and check the Comments table again to see the changes:
We've built a complete Data Repository with support for all CRUD operations.
That's all!!
Happy programming.....
כתב: כרמל שוורצמן
No comments:
Post a Comment