By Carmel Shvartzman
In this tutorial we'll learn how to create a static RadioButtonList HTML Helper in an MVC View in ASP.NET MVC 4. This RadioButtonList will expose just a few items statically coded in a class, and sent by the Action method from the web server.
An Html Helper is a class designed for rendering HTML controls to the Views. It supports several extension methods representing the different controls such as forms, textboxes, labels, dropdownlists, routelinks ( "< a >" ) , actionlinks ( "< a >" ) ,textareas, passwords, listboxes, checkboxes, radiobuttons, hidden fields, editors, and validation code.
We'll want to add a RadioButtonList to the web page, as follows:
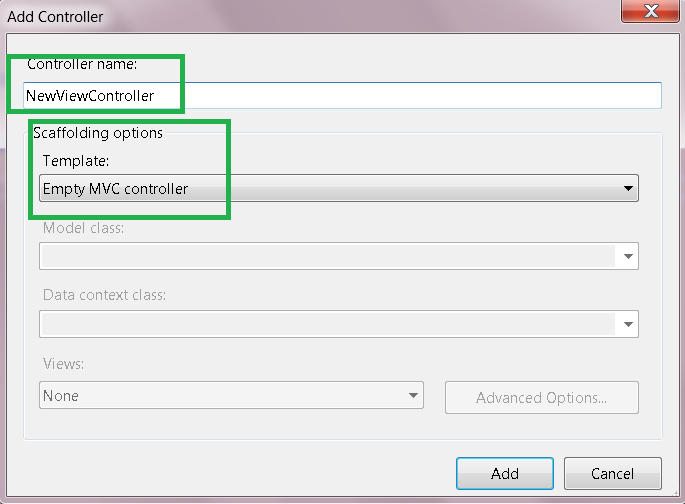
To use the HTML Helpers we must create our own View, so first let's create a new Controller called "NewViewController", and then add a View to the Index Action method. So right click over the Controllers folder, and add a new Controller:
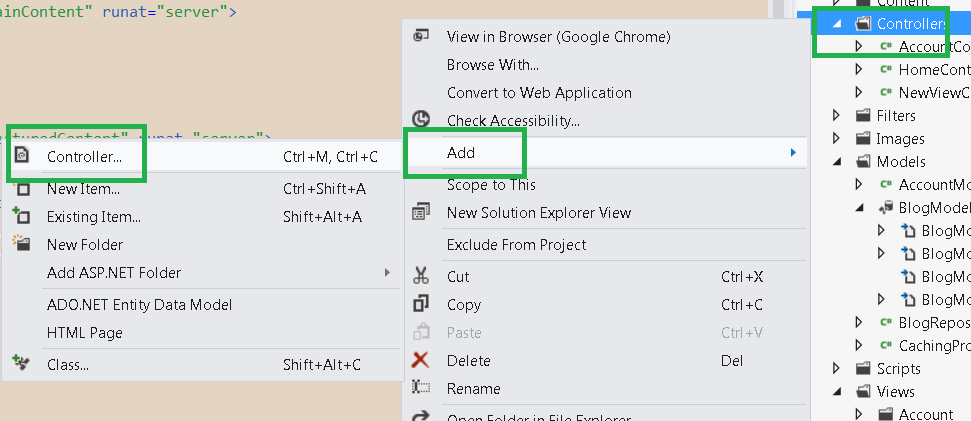
Name it "NewViewController", and select the template "Empty MVC Controller":
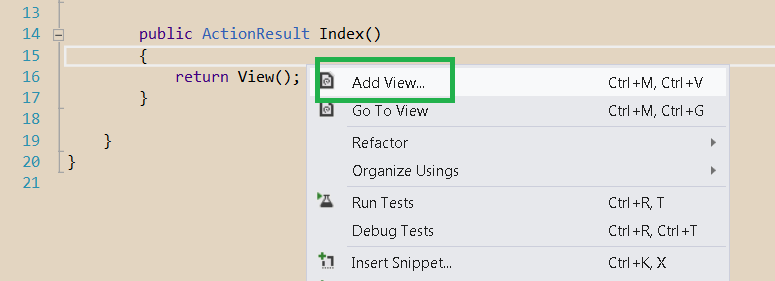
Open the Controller file and find the "Index" Action method:

Right click on it and select the option "Add View":
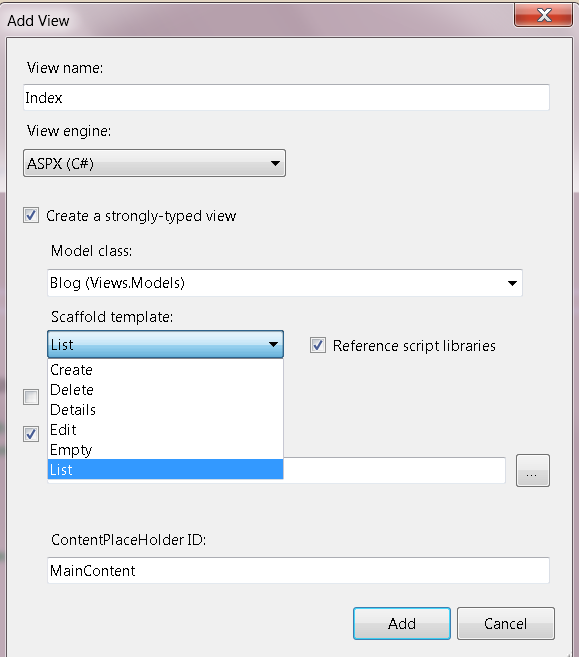
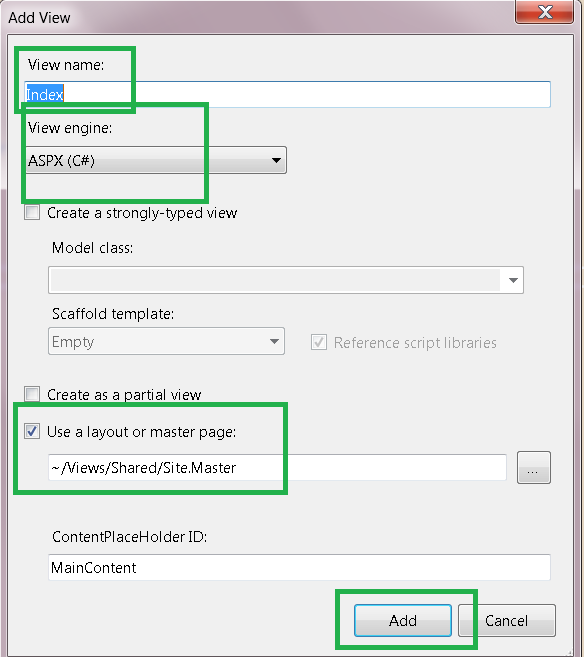
On the dialog, let the name be "Index", select the "ASPX" View engine, and choose a master page:
We'll want to add a RadioButtonList to the web page, as follows:
To use the HTML Helpers we must create our own View, so first let's create a new Controller called "NewViewController", and then add a View to the Index Action method. So right click over the Controllers folder, and add a new Controller:
Name it "NewViewController", and select the template "Empty MVC Controller":
Open the Controller file and find the "Index" Action method:
Right click on it and select the option "Add View":
On the dialog, let the name be "Index", select the "ASPX" View engine, and choose a master page:
The HTML Helper we'll learn about is the RadioButtonList control. For the other HTML Helpers, refer to the "Categories" Menu in the top-right place in this Blog.
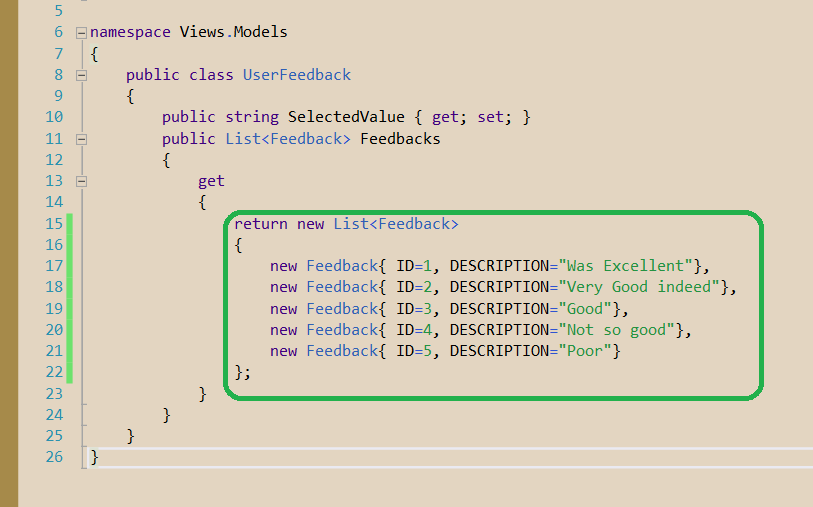
We need a wrapper class to manage the Feedbacks, keeping track of the user's selected item. Create a UserFeedback class in the Models folder:

This class will be exposing a string property "SelectedValue" to be used by the requests to send back the ID of the selected item, and a List<Feedback> with the items from database:
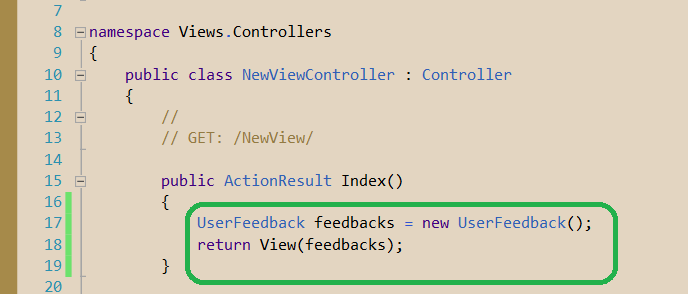
Now for the code in the Action method, find the "Index" in the Controller, and add the code to populate the RadioButtonList, sending the UserFeedback instance to the View :
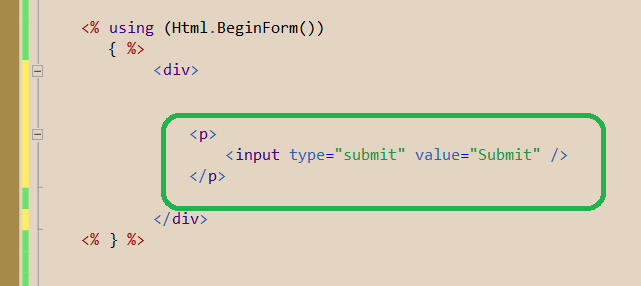
Our RadioButtonList will reside inside a Form. Create the Form object taking care of its tags, and add a button in order to submit the form:
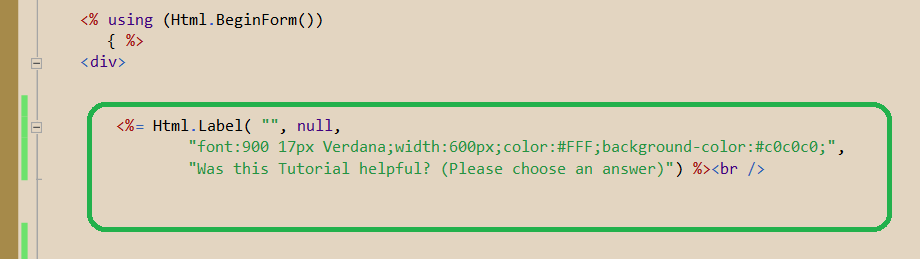
Now, add the label which will inform the user what is the RadioButtonList about. This label is a custom Html Helper created by us in a previous tutorial :
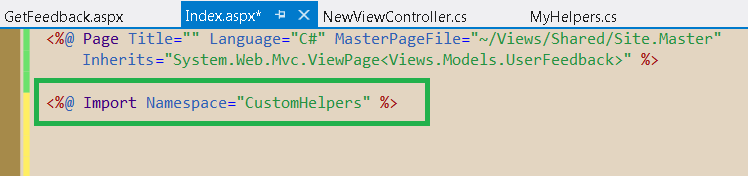
To use the custom Html Helper , in case you're using it, we need to add the "Import" directive as follows:
Also on top of the markup we define the Model this View is using: an UserFeedback object:

Inside the Form tag, type an foreach expression to display each of the feedbacks stored in the Feedbacks property of the UserFeedback instance:

Next, we'll add the RadioButtonList , using an overload of the extension method with the following parameters:

The first parameter will be an Linq expression containing the property to be rendered and to be sent back with the request, in our case, is the SelectedValue property. The second parameter will be the value of each item:

Finally, we append the name of each item using its "Description" property:

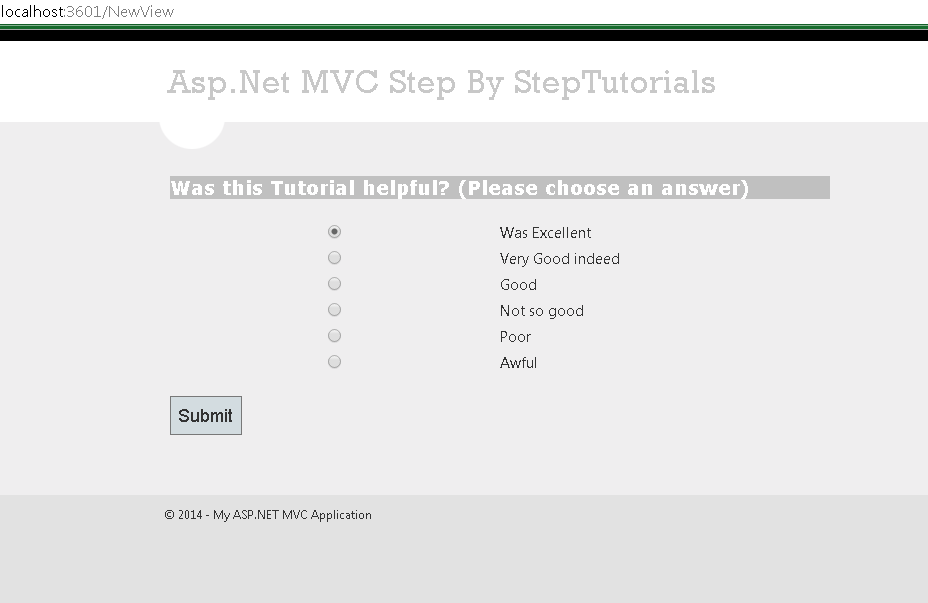
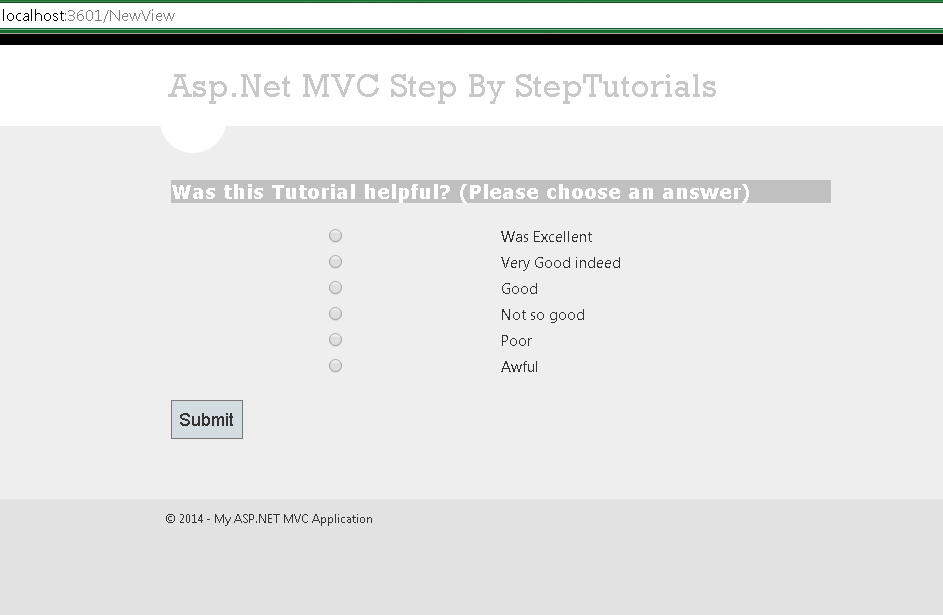
Buid (F6) and run your app (CTL-F5) , to get this presentation UI:
Now, what happens when we press the Submit button? Let's take a look at the Network tab on the Developer's Tools (F12):

An HTTP POST request has been sent to the web server, containing the Form data , the key = "SelectedValue" with the value = "2":

Therefore, we need to create a new Action Method at the "NewView" Controller to handle the HTTP POST request ( AcceptVerbs(HttpVerbs.Post) ), with the same name "Index" ( ActionName("Index") ). So add the following "GetFeedback" Action method with the "SelectedValue" parameter:
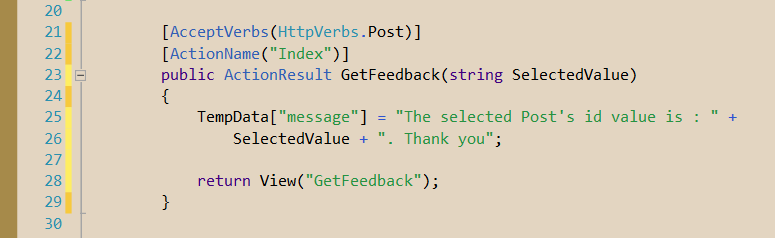
Also, we'll use the received value to send a message to the user, via the TempDataDictionary.
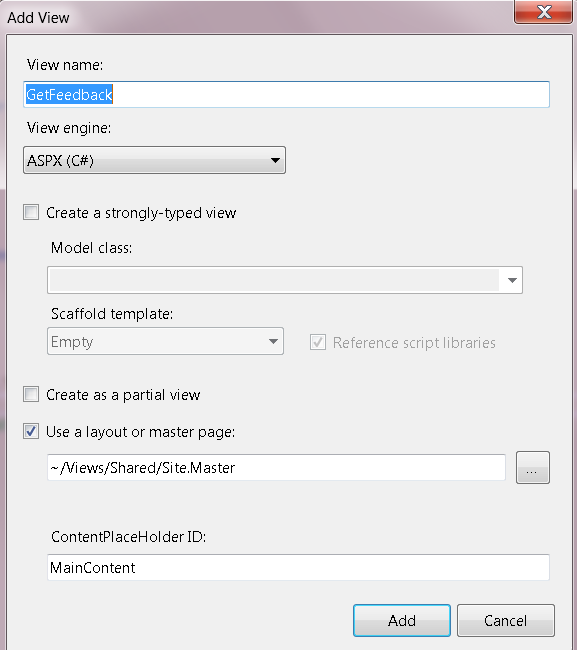
Open the View we just created, and type the TempData["message"] in order to display a message to the user. Through this message, we'll inform the user which radio button has been selected:

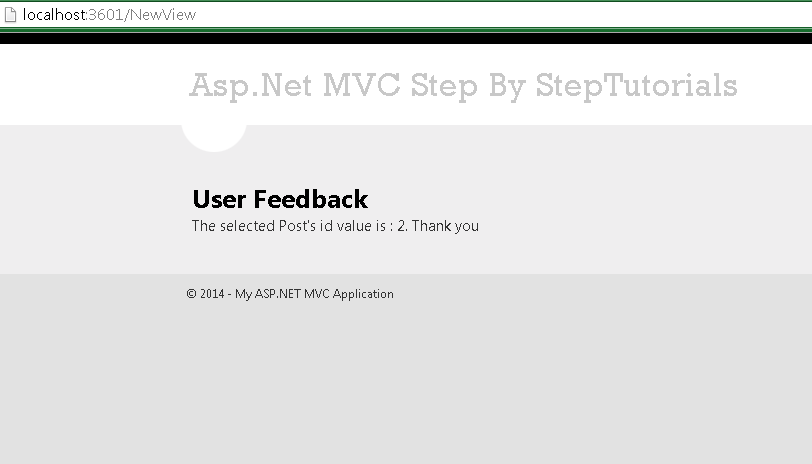
Rebuild the application and select a Feedback, next pressing the Submit button:
This time the user gets a message informing her/him that the selected value was 1:
In this tutorial we've learned how to create a static RadioButtonList HTML Helper, in an MVC View in ASP.NET MVC 4, sending to it data via the ViewDataDictionary and the ViewBag wrapper.
That's all!!
Happy programming.....
כתב: כרמל שוורצמן