By Carmel Shvartzman
In this tutorial we'll learn how to use the WebGrid Web Helper in ASP.NET MVC 4. This Grid will expose data dynamically loaded from database and sent by the Action method from the web server.We'll want to add a Grid to the web page, showing as follows:

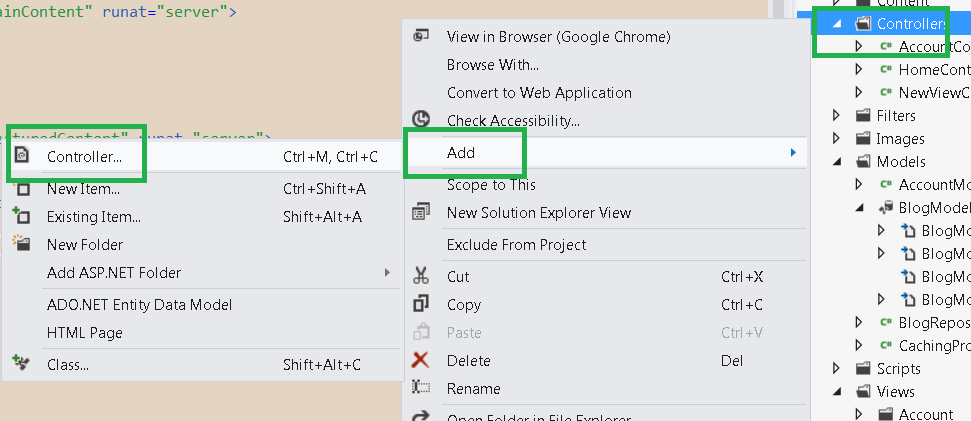
To use the Web Helper we must create our own View, so first let's create a new Controller called "NewViewController", and then add a View to the Index Action method. So right click over the Controllers folder, and add a new Controller:
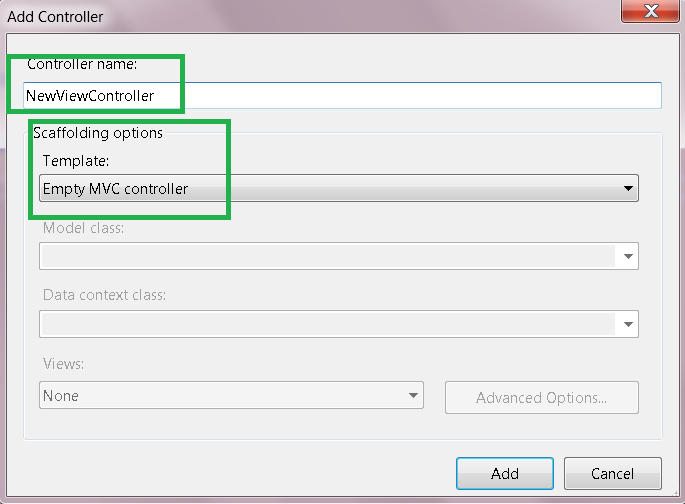
Name it "NewViewController", and select the template "Empty MVC Controller":
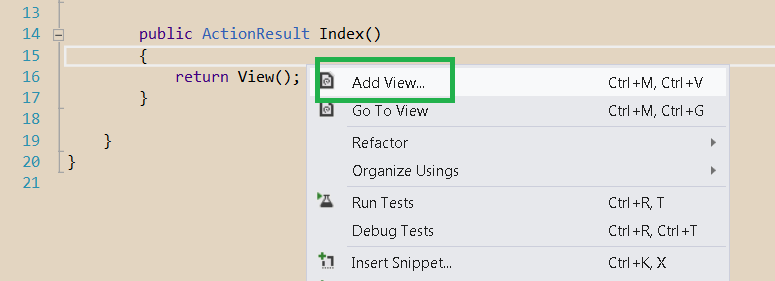
Open the Controller file and find the "Index" Action method:

Right click on it and select the option "Add View":
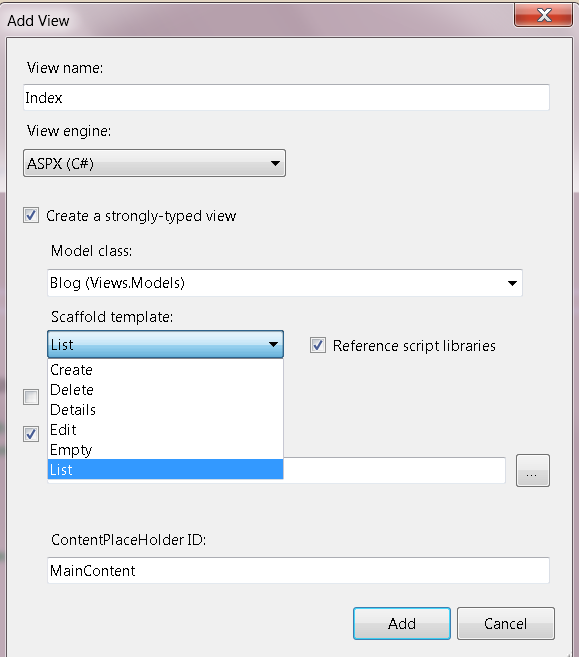
On the dialog, let the name be "Index", select the "ASPX" View engine, choose a strongly typed View with a List of Blog, and choose a master page:
The Web Helper we'll learn about is the Grid control. For the other Web Helpers, refer to the "Categories" Menu in the top-right place in this Blog. We'll use the Entity Framework Data Model and the Repository we created in a previous tutorial . The repository exposes three Entities: Feedback, Blog and Comment, these later with a one to many relationship between them:

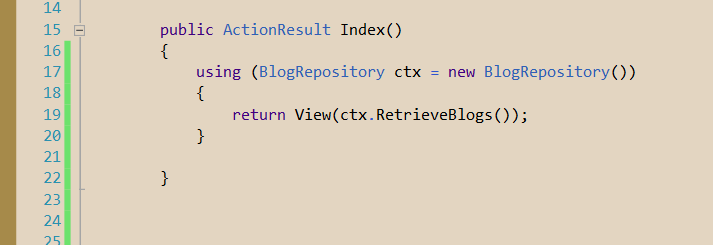
We'll add code to the Action method, in order to populate the Grid, so find the "Index" in the Controller, and add the following code, sending the data fetched from the Repository to the View :
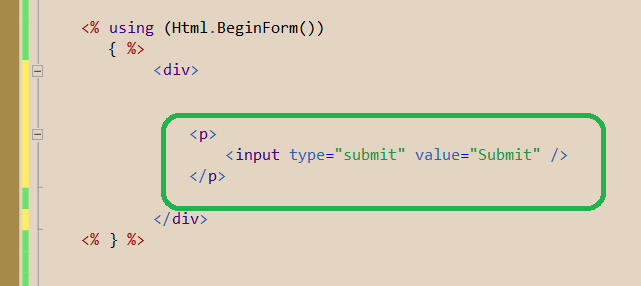
Now open the View we just created. Let's add a Grid to the View. Although it is not necessary, because for now we don't need to send data back to the web server, our Grid will reside inside a Form. Create the Form object taking care of its tags, and add a button in order to submit the form:
[This section is optional. It just adds a custom HtmlHelper to the form. You can skip it.]
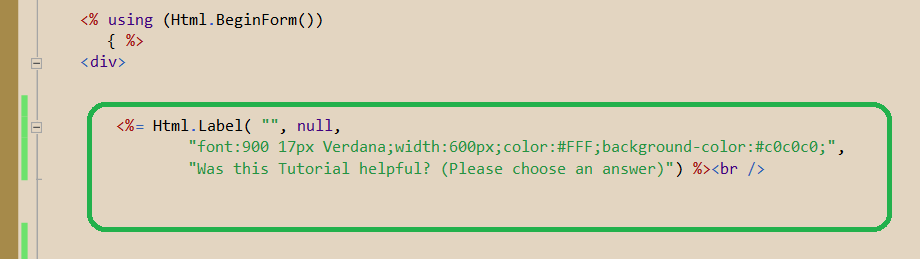
Now, add the label which will inform the user what is the Grid about. This label is a custom Html Helper created by us in a previous tutorial :
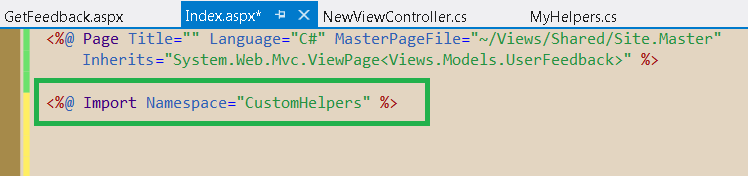
To use the custom Html Helper , in case you're using it, we need to add the "Import" directive as follows:
[End of the optional section]
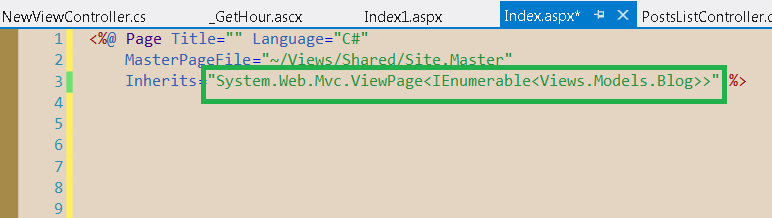
Also on top of the markup we define the Model this View is using: an IEnumerable<Blog> object:
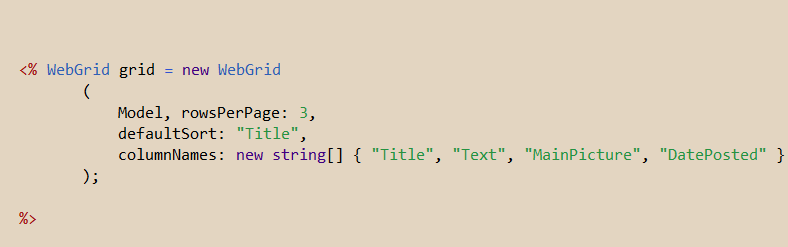
Next, we'll instantiate a WebGrid, using an overload of the extension method with the following parameters:

The final code for the WebGrid will set as its arguments the data included in the Model (an IEnumerable<>), the number of rows to display in each page, the sorting order and the columns to be displayed:
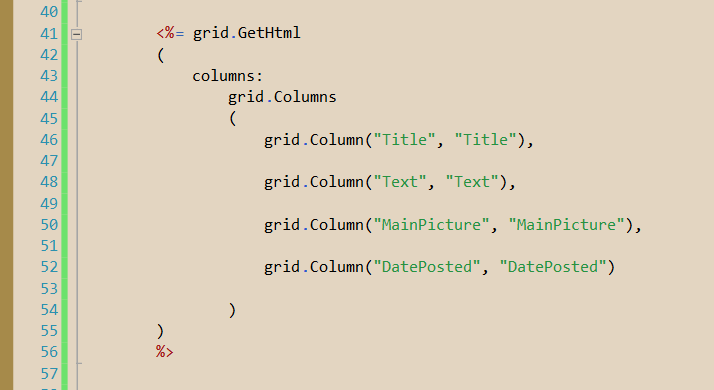
Now we display the markup of the WebGrid using the GetHtml() WebGrid method:
Buid (F6) and run your app (CTL-F5) , to get this presentation UI:
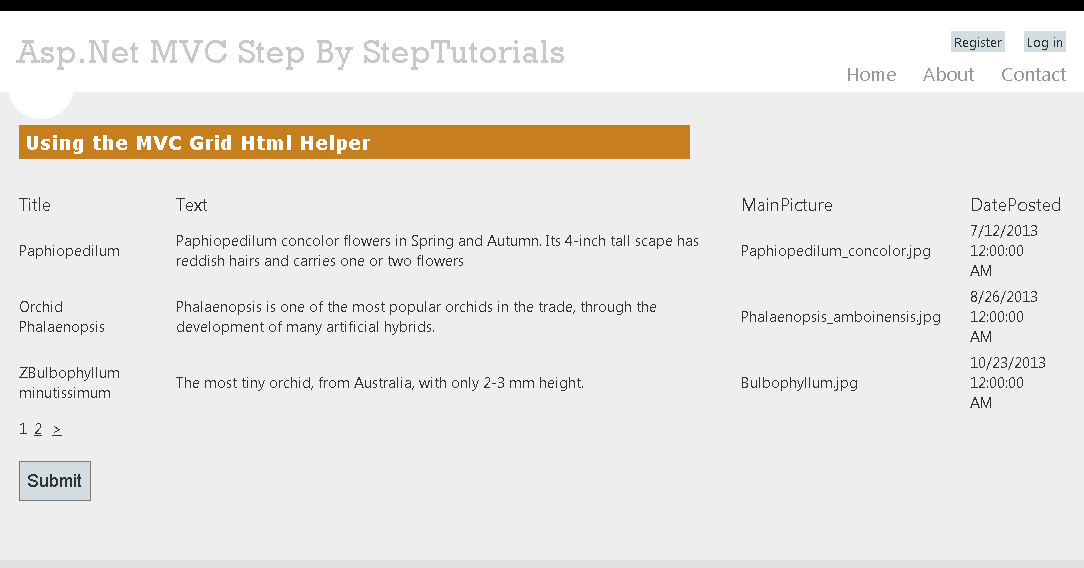
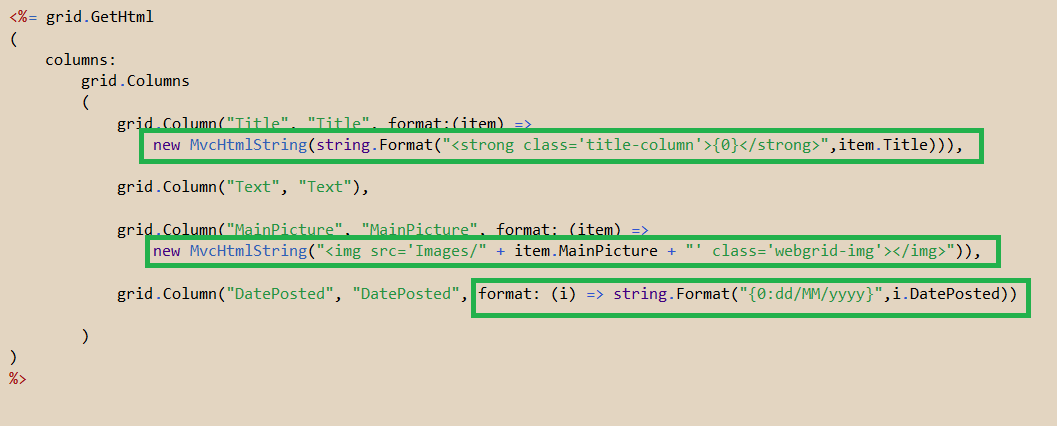
As you can see, the Grid has not built-in style, and also the date and the pictures had not been correctly displayed. Let's add templates for displaying the data, using the "format:" argument, to display html tags correctly via the MvcHtmlString() class:
Refresh the web page, and look at the results:
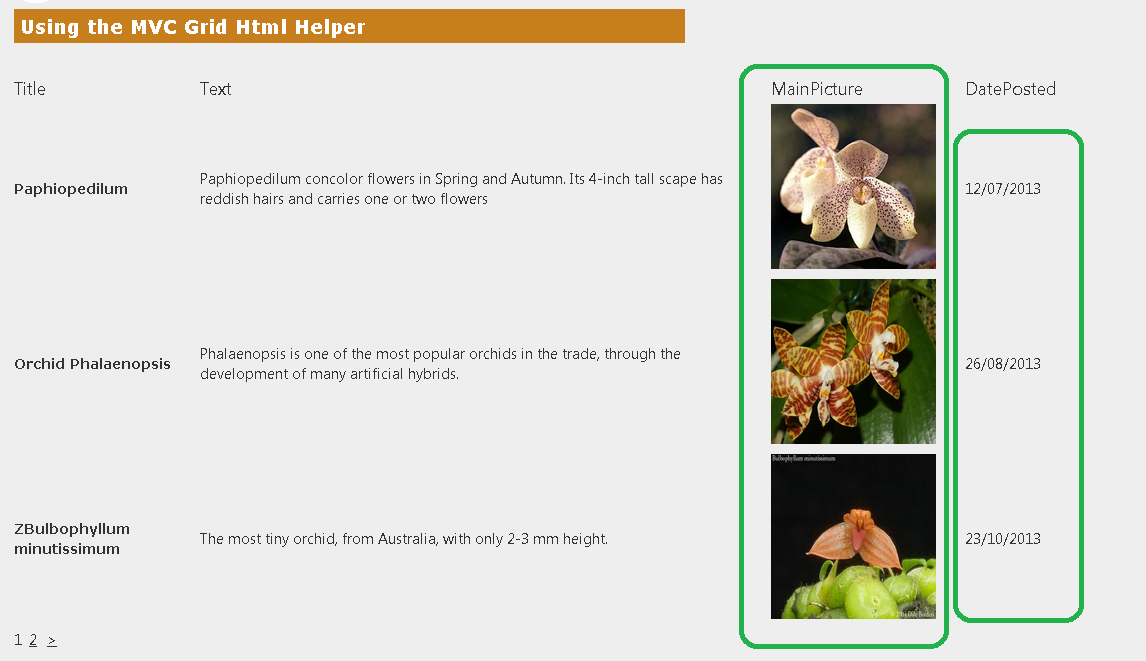
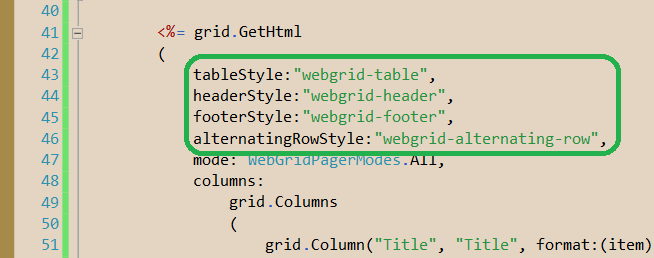
This time we got the pictures, the dates and the Titles well displayed. Now let's add some style using the style arguments. There we send style arguments for the header, footer, alternate rows, etc:
Add a new .css stylesheet file to the "Contents" folder:

Name the .css as GridStyle:

In the stylesheet we include all the style for the WebGrid, footer, header, hyperlinks, even the style for displaying adecuately the pictures:

The code (to copy-paste) is the following:
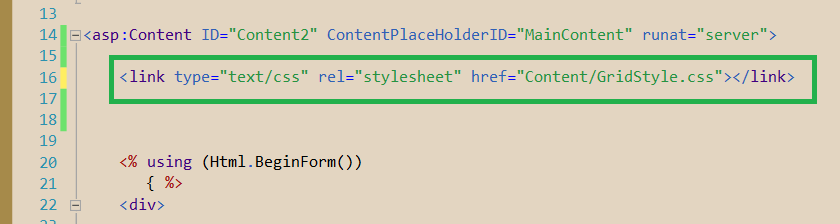
Finally we add a <link> tag before the WebGrid, to include the .css in the Index View:
Refresh the web page, and look at the results:

[This section is optional. It just adds a custom HtmlHelper to the form. You can skip it.]
Now, add the label which will inform the user what is the Grid about. This label is a custom Html Helper created by us in a previous tutorial :
To use the custom Html Helper , in case you're using it, we need to add the "Import" directive as follows:
[End of the optional section]
Also on top of the markup we define the Model this View is using: an IEnumerable<Blog> object:
Next, we'll instantiate a WebGrid, using an overload of the extension method with the following parameters:
The final code for the WebGrid will set as its arguments the data included in the Model (an IEnumerable<>), the number of rows to display in each page, the sorting order and the columns to be displayed:
Now we display the markup of the WebGrid using the GetHtml() WebGrid method:
Buid (F6) and run your app (CTL-F5) , to get this presentation UI:
As you can see, the Grid has not built-in style, and also the date and the pictures had not been correctly displayed. Let's add templates for displaying the data, using the "format:" argument, to display html tags correctly via the MvcHtmlString() class:
Refresh the web page, and look at the results:
This time we got the pictures, the dates and the Titles well displayed. Now let's add some style using the style arguments. There we send style arguments for the header, footer, alternate rows, etc:
Add a new .css stylesheet file to the "Contents" folder:
Name the .css as GridStyle:
In the stylesheet we include all the style for the WebGrid, footer, header, hyperlinks, even the style for displaying adecuately the pictures:
The code (to copy-paste) is the following:
.webgrid-table
{
font:italic 11px Verdana;
width: 100%;
display:grid;
border-collapse: separate;
border: solid 1px #98BF21;
background-color: #f0c9a0;
padding: 5px 5px 5px 5px;
}
.webgrid-header a
{
background-color: #c67f1c;
color: #FFFFFF !important;
font: 900 14px Verdana !important;
padding:5px 5px 5px 5px;
text-align: center;
}
.webgrid-footer, .webgrid-footer a
{
background-color: #c67f1c;
color: #FFF;
font: 900 14px Verdana;
padding:3px 3px 3px 3px;
}
.webgrid-alternating-row
{
background-color: #e5d773;
padding:5px 5px 5px 5px;
}
.title-column
{
font:900 13px Verdana;
text-align:center;
}
.webgrid-img
{
width: 150px;
height: 150px;
}
Refresh the web page, and look at the results:
Notice that you can do paging, and also the records are sorted by Title, ascending. Click on the headers of the WebGrid to sort them by date or text, or try to invert the sorting to be descending:
As you can see, i sorted the WebGrid by date descending, by clicking the DatePosted header.
In this tutorial we've learned how to use the WebGrid Web Helper in ASP.NET MVC 4, exposing data dynamically loaded from database and sent by the Action method from the web server. That's all!!
Happy programming.....
כתב: כרמל שוורצמן
No comments:
Post a Comment