Sunday, April 27, 2014

Step by Step how to create a Cascading DropDownList with Ajax functionality

        By Carmel Shvartzman


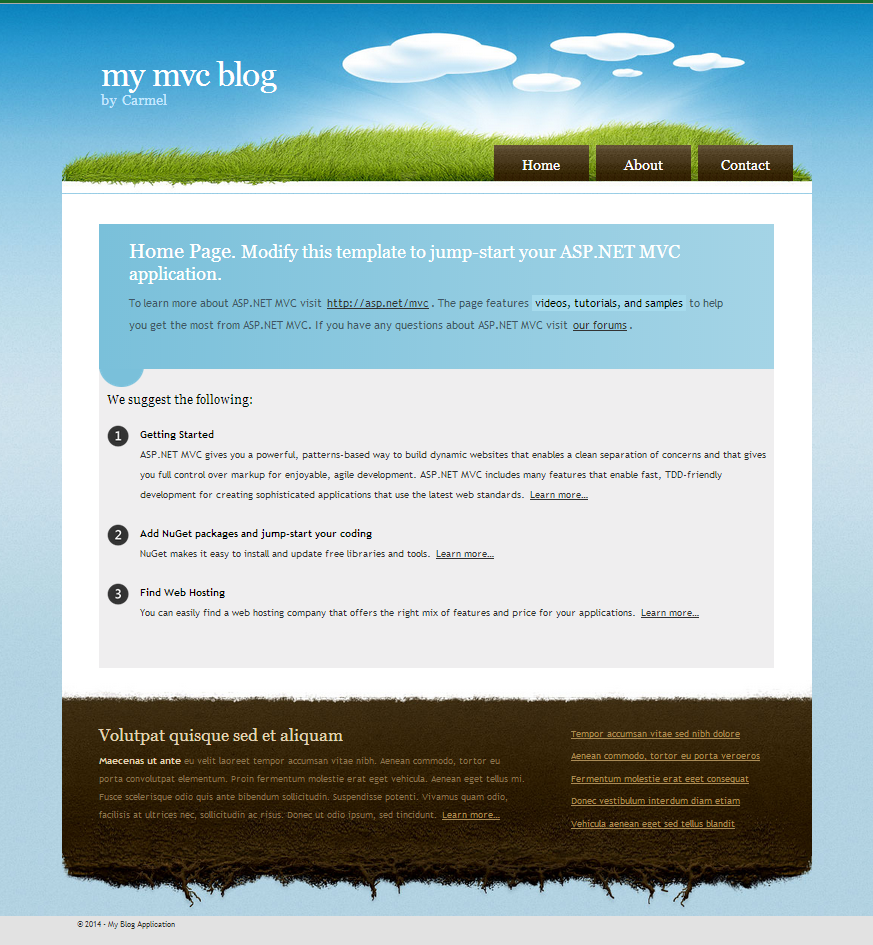
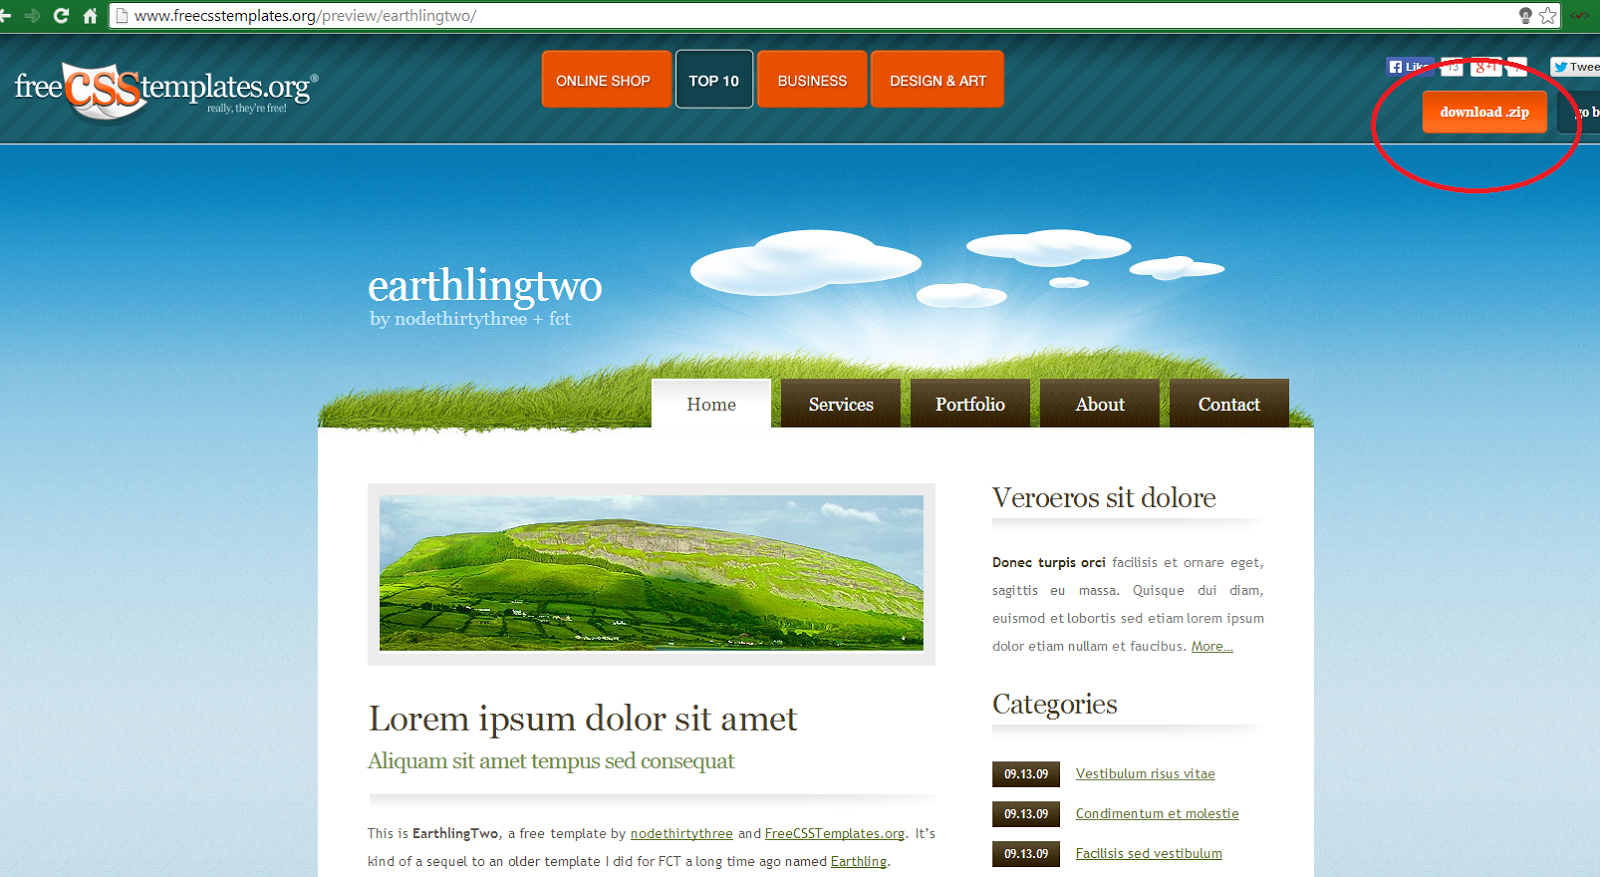
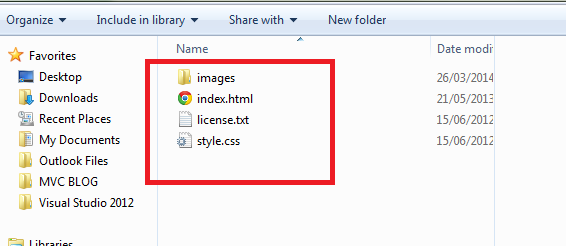
In this tutorial we'll learn how to create two Cascading DropDownLists with Ajax functionality. The  two Cascading DropDownLists will update its items dynamically Ajax-loading data from database, according to the user's selections.

We'll design a web site using a free CSS Template, as explained in a former tutorial,  and a JQuery UI Theme that we imported in this tutorial. They are short step by step begginer's guides, so if you like the look-and-feel of this web site, follow those 10 minutes tutorials to make this same site.

We'll want to create two Cascading DropDownLists with Ajax functionality , showing as follows:

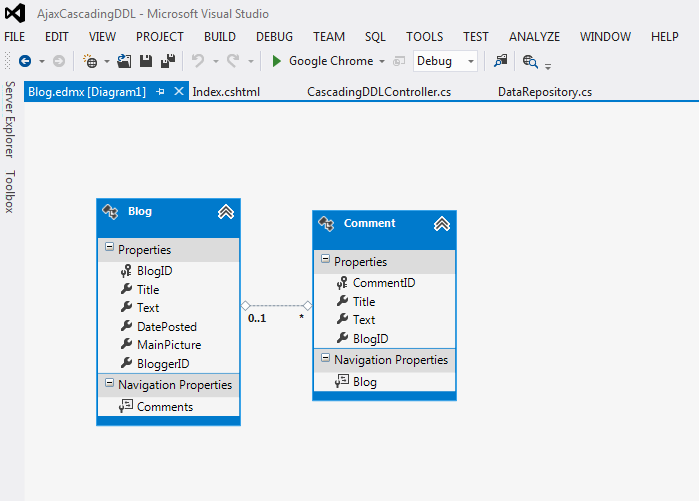
The <select> tags will be loaded with data from the following related entities:


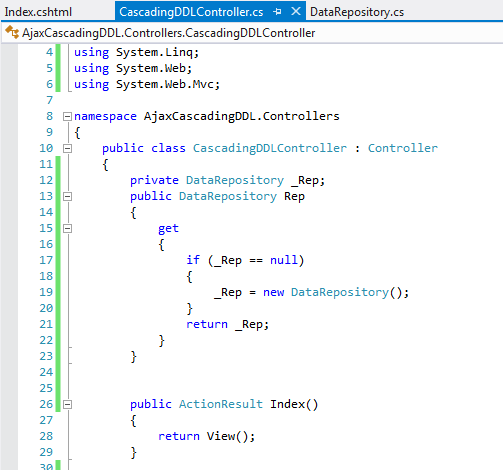
First, create a new Controller and create a Repository instance (provided you have one):


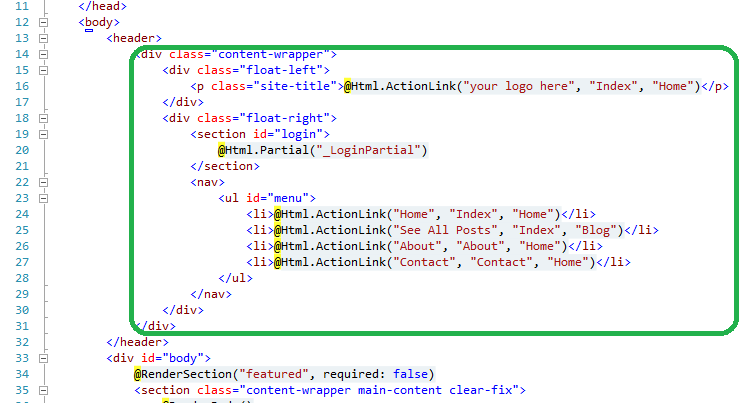
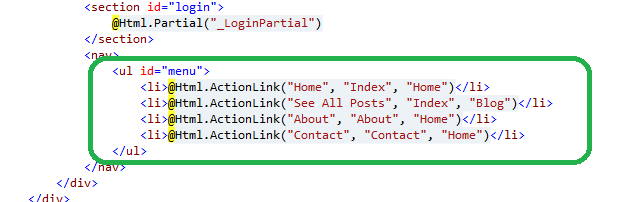
Add a new View for the Index Action method, and create two <select> as follows:

<div class="ui-widget-content ui-corner-all divselect">
    <div class="float-left">
        Select a Blog Post
        <br />
        <select id="Posts">
            <option value="-1">Select a Post</option>
        </select>
    </div>
    <div class="float-right">
        Select a Post Comment<br />
        <select id="Comments">
            <option value="-1">Select a Comment</option>
        </select>
    </div>
    <div id="txtComment" class="ui-widget-content ui-corner-all divselect float-left"></div>
</div>

Notice we're using the JQueryUI theme CSS classes.
Now add a <script> and an Ajax $.getJSON() call which executes right after the HTML document is loaded. This call will populate the FIRST <select>  control:


<script>$(function () {
    $.getJSON("CascadingDDL/Blogs/", function (data) {
        var list = "<option value='-1'>Select a Post</option>";
        $.each(data, function (i, post) {
            list += "<option value='" + post.Value + "'>" + post.Text + "</option>";
        });
        $("#Posts").html(list);
    });

The function makes a HTTP_GET call to the following Action method, which returns all the Blog posts in JSON notation:


public ActionResult Blogs()
        {
            List<Blog> posts = Rep.RetrieveBlog(null).ToList();
            if (HttpContext.Request.IsAjaxRequest())
            {
                SelectList select = new SelectList(posts, "BlogID", "Title");
                return Json(select, JsonRequestBehavior.AllowGet);
            }
            return View(posts);
        }

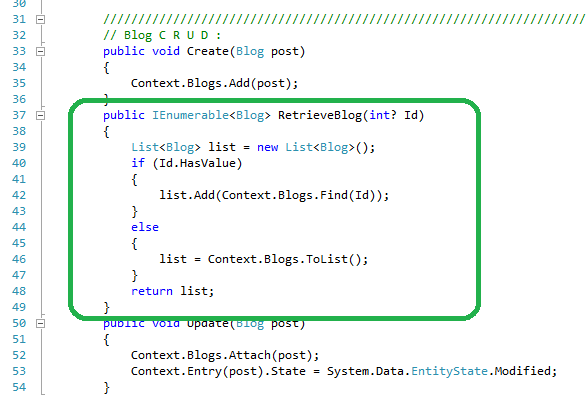
This Action method uses the RetrieveBlog method on the Repository:

       public IEnumerable<Blog> RetrieveBlog(int? Id)
        {
            List<Blog> list = new List<Blog>();
            if (Id.HasValue)
            {
                list.Add(Context.Blogs.Find(Id));
            }
            else
            {
                list = Context.Blogs.ToList();
            }
            return list;
        }

It's a generic method which works with or without a parameter.
Next, add an event handler for the 1st <select> CHANGE event at the <script>:


 $("#Posts").change(function () {
        var PostId = $("#Posts > option:selected").attr("value");
        $.getJSON("CascadingDDL/Comments/" + PostId, function (data) {
            var list = "<option value='-1'>Select a Comment</option>";
            $.each(data, function (k, comment) {
                list += "<option value='" + comment.Value + "'>" + comment.Text + "</option>";
            });
            $("#Comments").html(list);
        });
    });

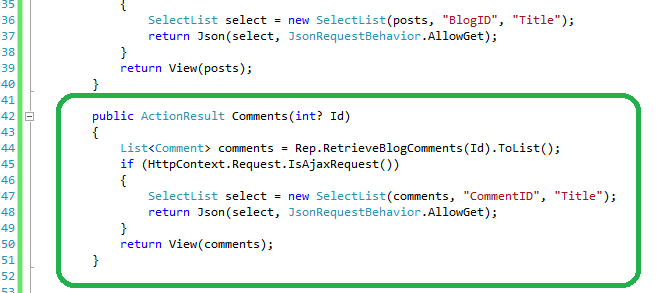
This sends an Ajax HTTP_GET request to populate the 2nd <select> with the data corresponding to the SELECTED value at the 1st <select> control. This $.getJSON calls another Action method :


 public ActionResult Comments(int? Id)
        {
            List<Comment> comments = Rep.RetrieveBlogComments(Id).ToList();
            if (HttpContext.Request.IsAjaxRequest())
            {
                SelectList select = new SelectList(comments, "CommentID", "Title");
                return Json(select, JsonRequestBehavior.AllowGet);
            }
            return View(comments);
        }

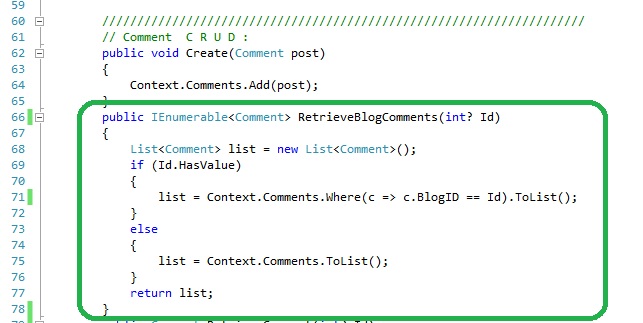
This method uses another Repository function as follows:

 public IEnumerable<Comment> RetrieveBlogComments(int? Id)
        {
            List<Comment> list = new List<Comment>();
            if (Id.HasValue)
            {
                list = Context.Comments.Where(c => c.BlogID == Id).ToList();
            }
            else
            {
                list = Context.Comments.ToList();
            }
            return list;
        }


This fetchs only the Comments corresponding to the selected Blog post.
Finally, append a last $.ajax HTTP_POST function to the <script>, in order to get the text of the selected Comment:

$("#Comments").change(function () {
        var Id = $("#Comments > option:selected").attr("value");
        if (Id >= 0) {
            $.ajax("CascadingDDL/CommentText/", {
                data: { "CommentId": Id }, type: "POST", success: function (txt) {
                    $("#txtComment").html("<i>" + txt + "</i>");
                }
            });
        }
    });

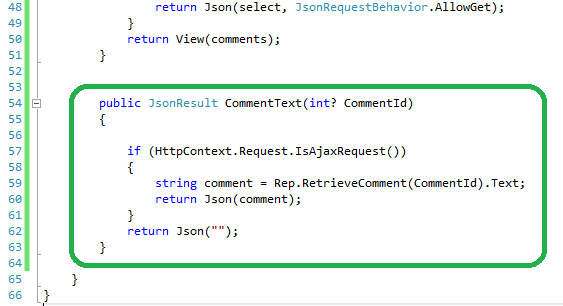
This $.ajax calls the following Action method:


 public JsonResult CommentText(int? CommentId)
        {
            if (HttpContext.Request.IsAjaxRequest())
            {
                string comment = Rep.RetrieveComment(CommentId).Text;
                return Json(comment);
            }
            return Json("");
        }

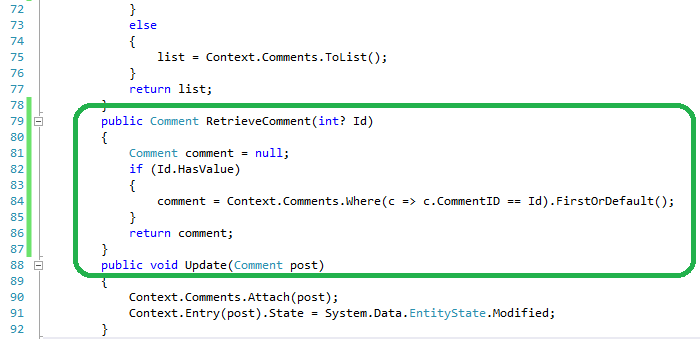
This Action method uses a Repository function to fetch the Comment's text::


 public Comment RetrieveComment(int? Id)
        {
            Comment comment = null;
            if (Id.HasValue)
            {
                comment = Context.Comments.Where(c => c.CommentID == Id).FirstOrDefault();
            }          
            return comment;
        }
Build and run the app:


When the user selects a Post, the list of Comments is refreshed:


And when a Comment is selected, its text is Ajax displayed below:


That's all!! 
In this tutorial we've learn how to create two Cascading DropDownLists with Ajax functionality.  

Happy programming.....


כתב: כרמל שוורצמן

Friday, April 18, 2014

Step By Step How to use the Google Maps API in MVC 4 in 15 minutes

        By Carmel Schvartzman

In this tutorial we'll learn how to use the Google Maps API in MVC 4 in 15 minutes. We'll build an application which loads a Google Map according to the user's input coordinates. 
In order to do that, you must have a Google Maps Developer Key. I'll lead you through the process of getting that Key from Google's Developer Center.
The Google Maps API application must load the Maps API using an API developer key. Using an API key enables the developer to test the application's Maps API.
The Key is free of charge, but it limits you to 25,000 requests per day, and also you're not allowed to use the Developer Key on any comercial purposes.

We'll want to create a Google Maps API in MVC 4 , showing as follows:


To get your personal Developer Key, search "google maps API key":


You'll browse to the developers.google.com site:


There you can click the link "Learn how to use an APIs console key":


Alternatively, you can directly enter the Google Maps API:


Selecting the "WEB" option, you get to the Web API:


Choose Javascript API v3, and then "Obtaining an API Key":


There you get a walktrough about obtaining the Key:


To see the differences between the FREE option to the COMERCIAL, take a look here:


Whether if you browse to the new Developer's Console:


...and choose the "APIs" from the Menu, or you enter the old Console...


...and select the "Services" from the Menu, look for the API called "GOOGLE MAPS JAVASCRIPT API v3", and ENABLE it, to obtain your Key:


After you log in with your Google ID, you get a Public API Access Key:


Save the API Key to a safe place. Now you have your Developer's Key.

We're ready to create an HTML file to use the Google Maps API. First add the DOCTYPE directive and the CSS we'll be using, including also the javascript for the API, with the Developer Key that you got from Google:

<!DOCTYPE html>
<html>
  <head>
    <meta name="viewport" content="initial-scale=1.0, user-scalable=no" />
    <style type="text/css">
      html { width:100%;height: 100%; }
      body { font:900 12px Georgia;color:#fff;background:#c67f1c;width:90%;height:90%;margin:5px 5px 5px 5px; }
      #map { width:70%;height: 97%; }
    </style>
    <script type="text/javascript"
      src="https://maps.googleapis.com/maps/api/js?key=HERE_TYPE_YOUR_KEY&sensor=true">
    </script>
Next, let's add the UI to get the coordinates from the user. I hard-coded some coordinates to get my own town in Argentina, Concepcion del Uruguay. You type want you like:

 </head>
  <body>
    <div>
   Type the latitude : &nbsp; <input id="latitude" value="-32.484" /><br />
Type the longitude : <input id="longitude" value="-58.231" /><br />
        <input type="button" value="Load Google Map" onclick="fnLoadMap()"/>
</div>
    <div id="map"/>
  </body>
</html>

Finally, we code the javascript function to load the Google Map when the user press the button. In order to do that, we'll take a look at the API Reference of the API version 3:


We'll load the Google Map calling the API function "Map", with a "MapOptions" argument, including the "center" property, which specifies the coordinates of the map:


...and including also the "zoom" we want to display the map:


The final code of the function will be as the following:


function fnLoadMap() {
 
var lat = document.getElementById("latitude").value;
        var long = document.getElementById("longitude").value;
        var mapOptions = {

          center: new google.maps.LatLng(lat,long),
          zoom: 15
        };
        var map = new google.maps.Map(document.getElementById("map"),
            mapOptions);
document.getElementById("map").innerHTML = map;
      }

The HTML file should look as follows:


Open the HTML in some browser, to see this UI:


Change the coordinates and press the button:


That's all!! 


In this tutorial we've learned how to use the Google Maps API in MVC 4 in 15 minutes. We built an application which loads a Google Map according to the user's input coordinates.   

Happy programming.....

כתב: כרמל שוורצמן


Monday, April 7, 2014

Step By Step How to create an outstanding MVC site using CSS Templates in 10 minutes

        By Carmel Schvartzman

In this tutorial we'll learn how to create an outstanding MVC site using CSS Templates in 10 minutes. Building an MVC website requires you to design far beyond the simple standard style provided by default by the Visual Studio environment. The task of writing CSS code for your own layout, can be a tedious work if you're not a web designer. CSS templates take care of this by providing you with a nicelly designed layout, which you can use to build your website.
Until some years ago, web page's layouts were put together using the HTML <TABLE> tag, which was originally meant for holding tabulated data more than for showing parts of a page. Nowadays there is a lead to using strictly CSS for their layouts instead, by means of the <div> tag essentially.
We'll be using CSS TEMPLATES to help us to build well designed web sites quickly. We can find on the web many CSS templates released for FREE, very lightweight and fast loading, tables-free and W3C standards compliant, also provided with public domain photos.
We'll want to create  an outstanding MVC site using CSS Templates , showing as follows:


First let's find some CSS templates on the web for FREE: make a search for "CSS FREE TEMPLATES". Right now the most used is the site from WIX on www.freecsstemplates.org :


Choose some template you like. I'll select the "earthlingtwo" template and download it:


Open the ZIP file :


Copy-paste the whole theme into the "Content" folder of the MVC application:


Now open the HTML file:


There are some very important tags that you must take into account to customize your site: <head> and <body>, and the <div>s "menu" and "content":


We're going to replace the standard HTML inside the template, with the layout from the MVC    "_Layout" file:


Open the _Layout file and see the markup we're going to embed inside the template:


Let's start by copying the _Layout <head> contents:


And PASTE them inside the CSS HTML template:


Also, fix the link to target to the CSS "Style" file inside the Content folder:


Now COPY the <header> markup from _Layout :


To the "header" <div> inside the template:


And replace the "menu" from the template:


...with the "menu" from the _Layout file:


The template's "header" will resume as follows, after the changes:


Next, COPY the "body" <div> from the MVC _Layout file...:


...replacing the whole "content" <div> inside the CSS template:


The final results should be:


Next, delete the entire "sidebar", because we don't need it:


Finally, COPY the <footer> tag from the _Layout:


...replacing the "footer" <div> inside the CSS template:


Resulting in the following:


Take care of copying the "scripts" section , to allow the MVC displaying properly.
The results should be approximately the following web design, after building the MVC application:


That's all!! 
In this tutorial we've learn how to create an outstanding MVC site using CSS Templates in 10 minutes.  

Happy programming.....


כתב: כרמל שוורצמן