By Carmel Shvartzman
In this tutorial we'll learn Step By Step how to Deploy an ASP.NET MVC 4 Application on a FREE Web Hosting.
We'll deploy the following Asp.Net MVC Application to the FREE HOSTING Somee.com host:

Browse to Somee.com :

Select the FREE Hosting Package :

You register and set the LOGIN info :

 Type the SUBDOMAIN of your Web Site :

And CREATE the site :

Now go to the File Manager, to UPLOAD your MVC site :

Open your file system where your MVC project is stored, and ZIP the entire MVC Web Site :


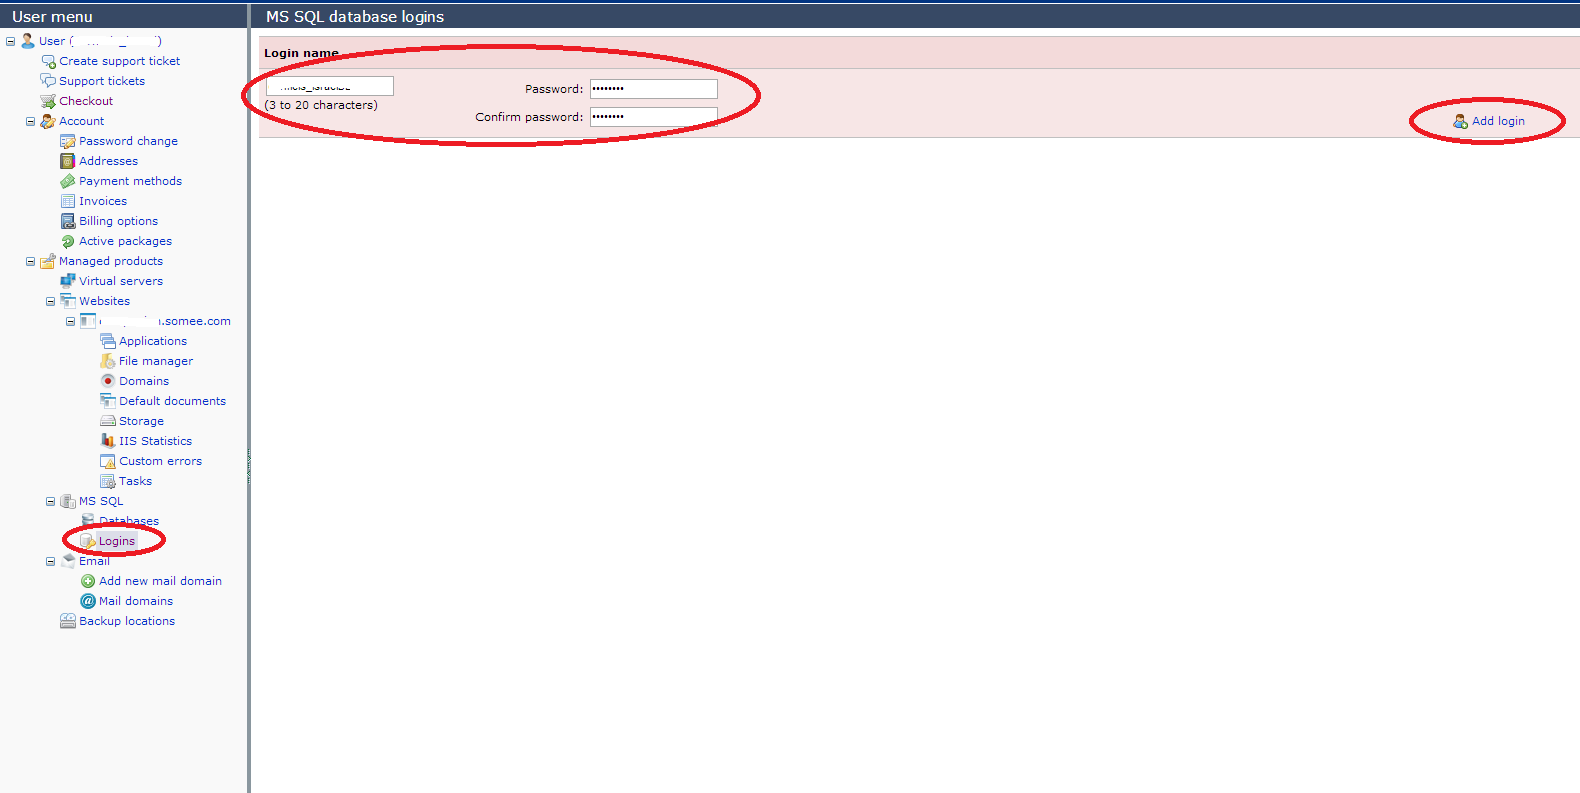
Now we must set the DATABASE. Create a LOGIN :
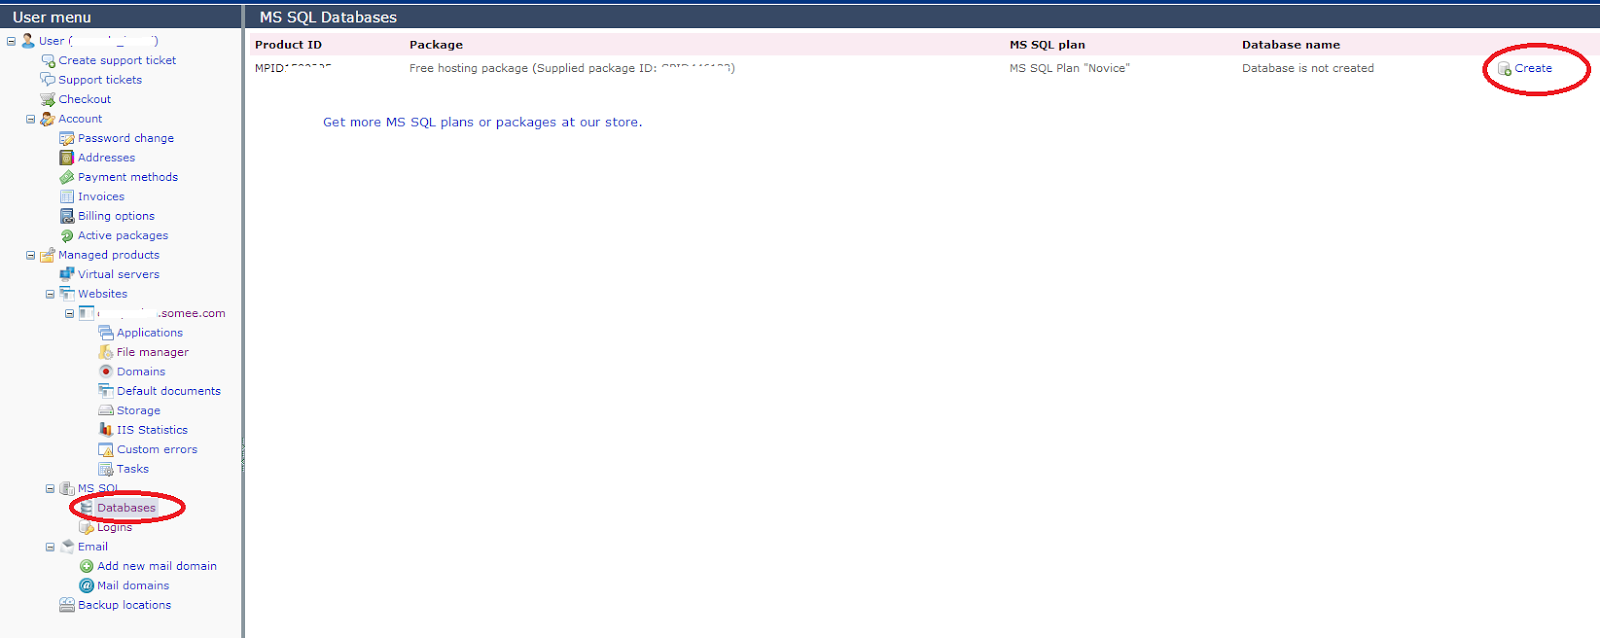
Create a DATABASE :


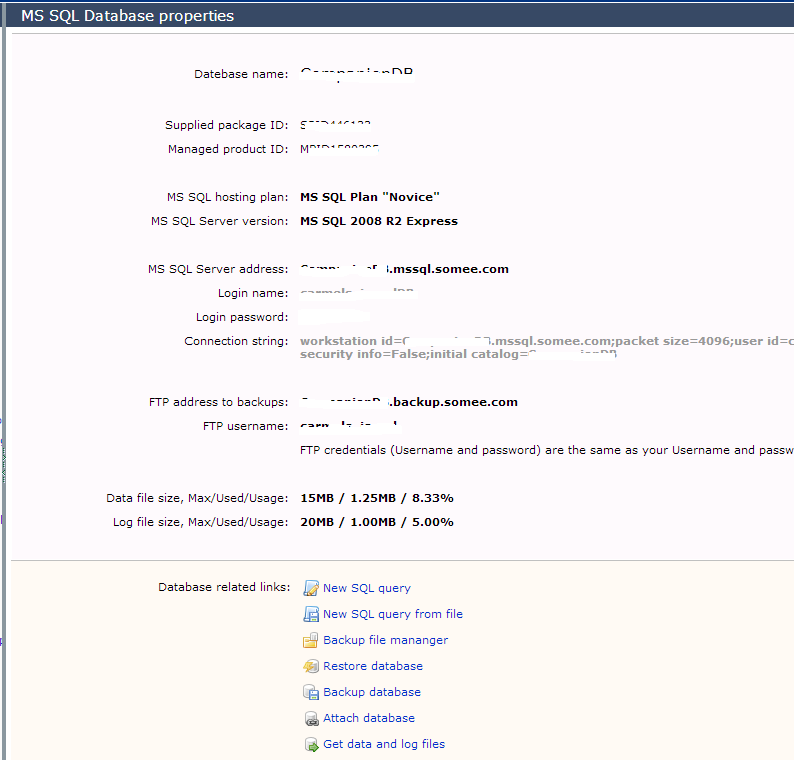
Take a look at the Database's settings :
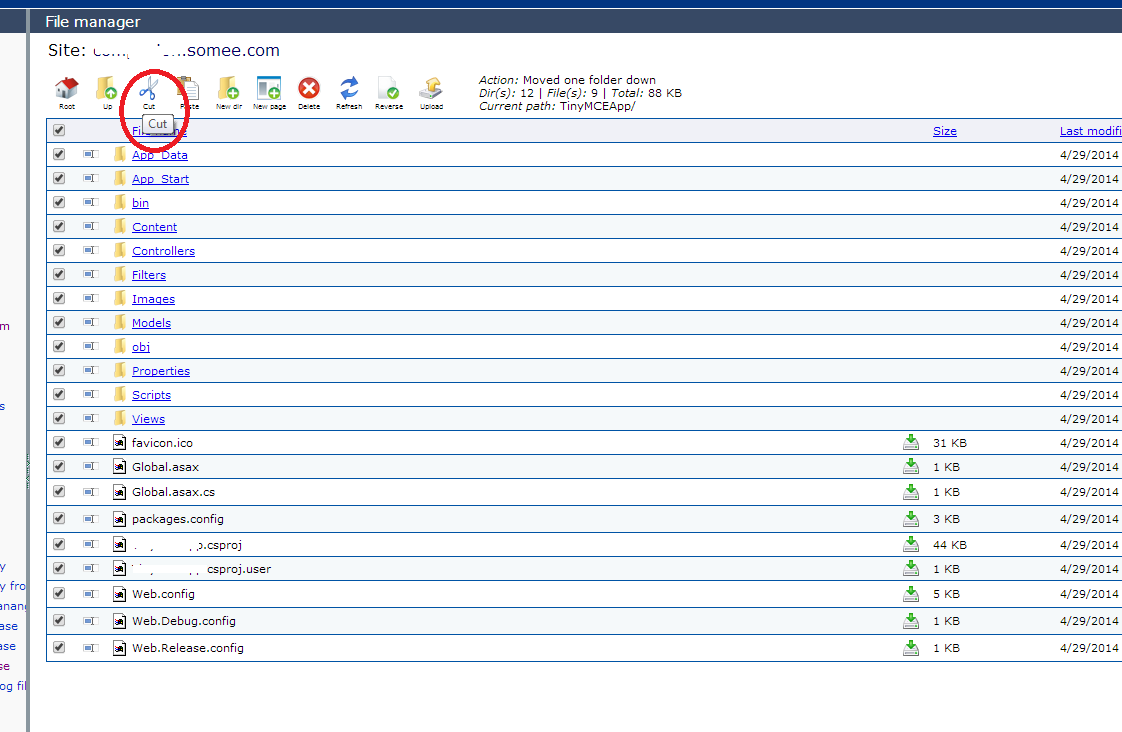
Now, we'll need to CUT & PASTE the entire web site to the UP folder :
 Now, you can browse to your web site. Of course, it will be an error, because the database connection at the web.config file is still pointing at your machine's sql server :

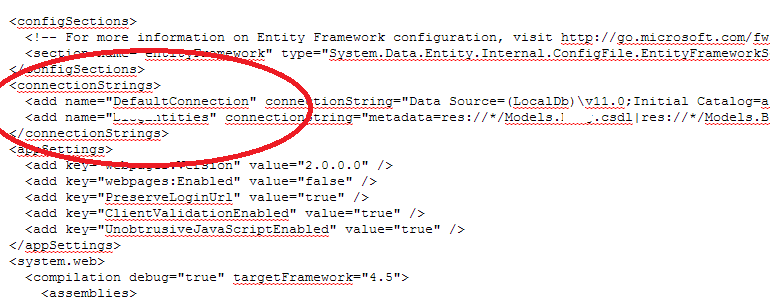
So let's change the connection string :
Where's the new connection string? At the SQL database properties view :

COPY the connection string, and open the web.config file :
There, find the "Provider Connection String" key :
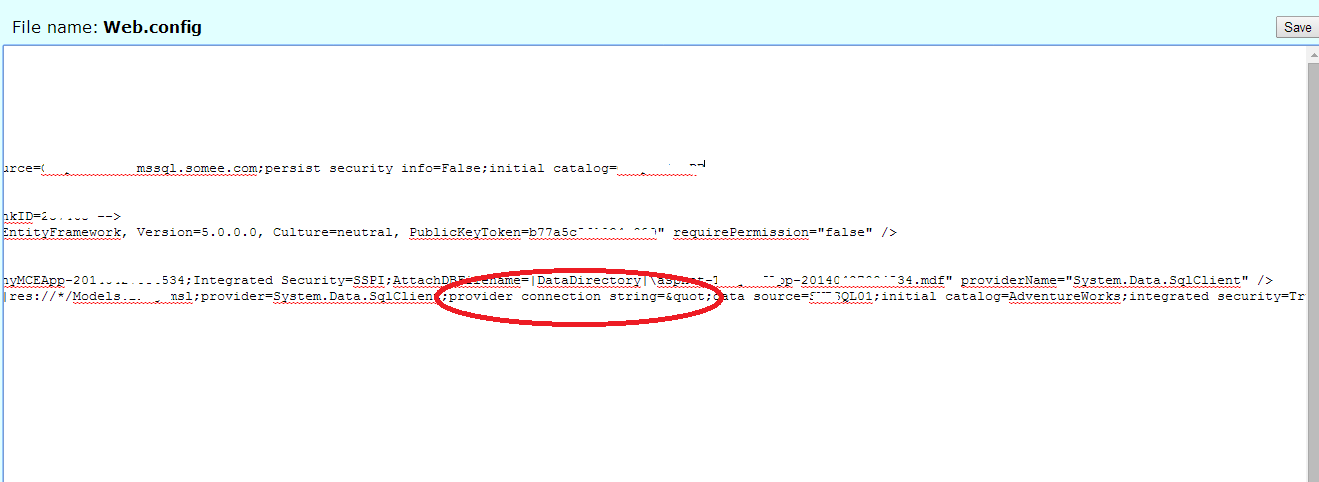
And PASTE the new connection BETWEEN the " " " :
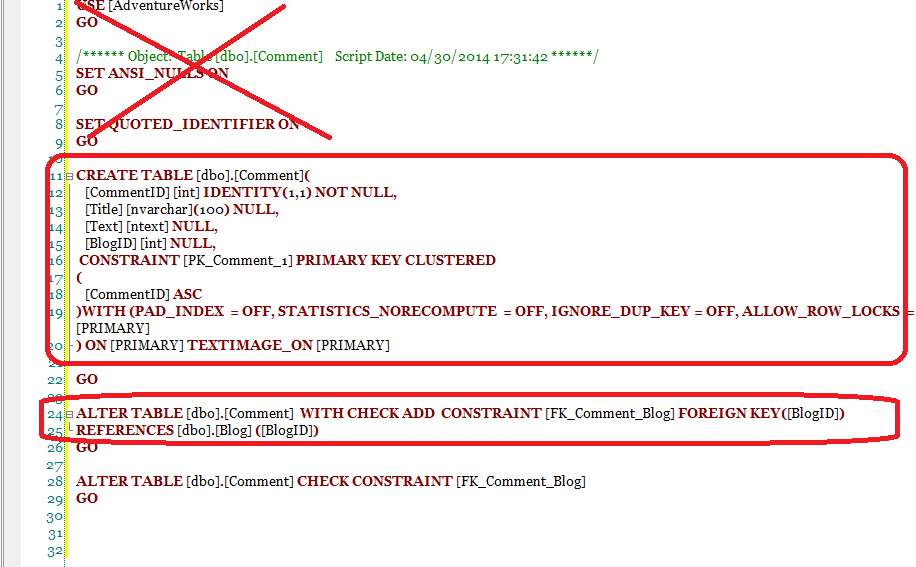
 That's not all. We'll keep getting an error because the database is empty. So let's create the tables using the automatically created sql SCRIPTS from the SQL Server Manager :
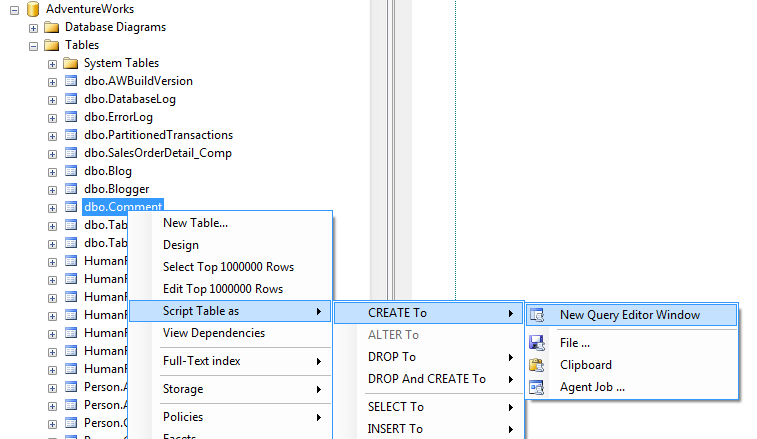
First, copy ONLY THE TABLES , and after that, copy the FOREIGN KEYS alter scripts :
Go to "New SQL Query" :

And PASTE the scripts , ONE BY ONE (the alternative is, of course, running a batch file):
 After you created all the tables, run ONE BY ONE the KEYS scripts .
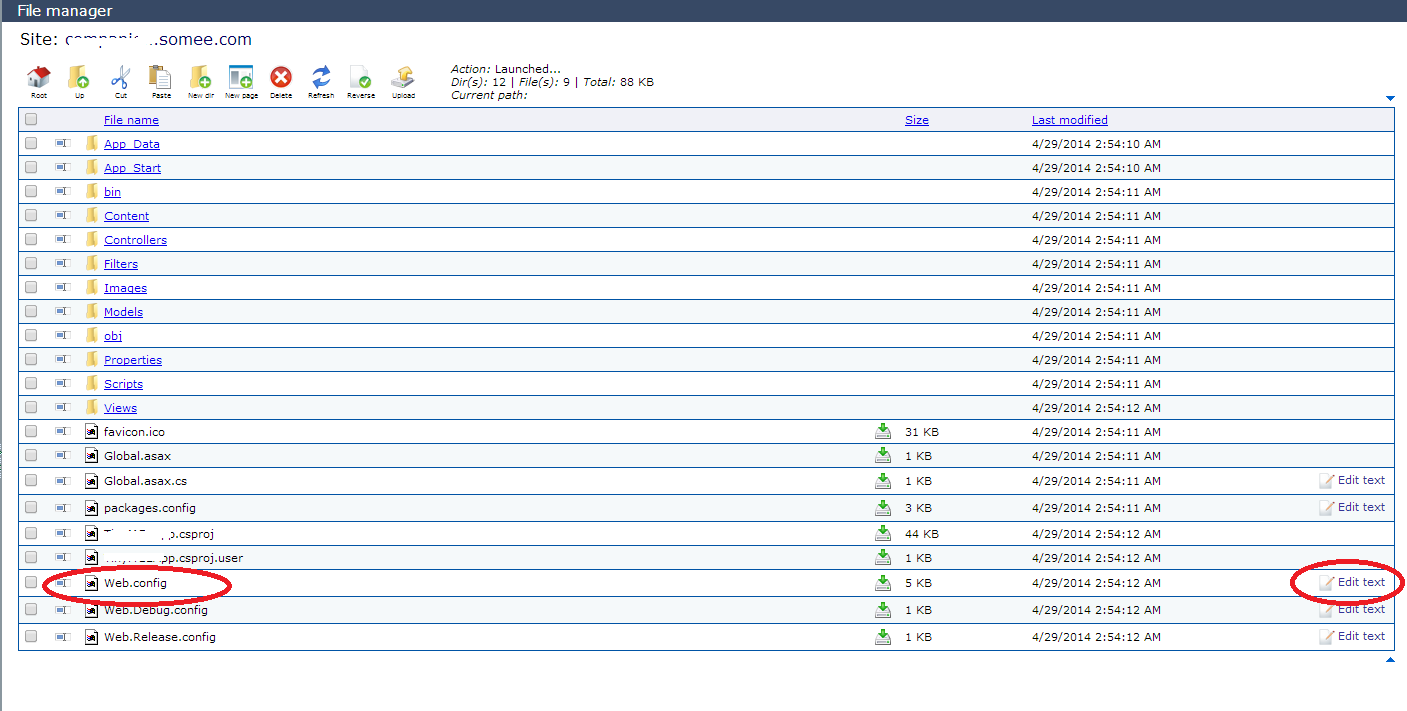
Finally, let's see how to update a single file at the site .
Just DOWNLOAD the file, clicking the download icon at the right, edit the file, and UPLOAD it again, taking care that the "Overwrite existing files" option is on:

And that's all. Enter some data, and browse to your site:


Happy programming.....
How to Deploy an ASP.NET MVC 4 Application to a FREE Web Host
Browse to Somee.com :
Select the FREE Hosting Package :
You register and set the LOGIN info :
Continue to get a Free Hosting Package :
And CREATE the site :
Now go to the File Manager, to UPLOAD your MVC site :
Open your file system where your MVC project is stored, and ZIP the entire MVC Web Site :
Then click "Upload & UnZip" :
After a while, you'll see the MVC files at the host :
Now we must set the DATABASE. Create a LOGIN :
Create a DATABASE :
Take a look at the Database's settings :
Now, we'll need to CUT & PASTE the entire web site to the UP folder :
So let's change the connection string :
Where's the new connection string? At the SQL database properties view :
COPY the connection string, and open the web.config file :
There, find the "Provider Connection String" key :
And PASTE the new connection BETWEEN the " " " :
First, copy ONLY THE TABLES , and after that, copy the FOREIGN KEYS alter scripts :
Go to "New SQL Query" :
And PASTE the scripts , ONE BY ONE (the alternative is, of course, running a batch file):
Finally, let's see how to update a single file at the site .
Just DOWNLOAD the file, clicking the download icon at the right, edit the file, and UPLOAD it again, taking care that the "Overwrite existing files" option is on:
And that's all. Enter some data, and browse to your site:
That's all!!
In this tutorial we've learned how to Deploy an ASP.NET MVC 4 Application on a FREE Web Host. Happy programming.....
כתב: כרמל שוורצמן
This post is useful for to learn a ASP.net MVC 4 Application how to deploy in azure very easy to understand for everyone thanks for posting this information....
ReplyDeleteDot Net Training And Placement in Chennai
Java Course and Certification
PHP Course in Chennai
Software Testing Training Institute in Chennai
Excellent, in case anyone want to check more hosting,
ReplyDeletecheck
Free ASP.NET hosting Provider (Free Classic ASP hosting)
Thanks