By Carmel Schvartzman
Here we'll see how to add a Twitter Bootstrap NavBar to your MVC Layout master file in a few minutes, replacing the standard menu.
Bootstrap is the more widely used and more popular HTML5 CSS3 framework for developing responsive web apps, making front-end web design very fast and easy.
In 2 minutes we'll add the Bootstrap CSS3 & script files to our MVC app in order to build a responsive webpage using the Twitter Bootstrap :
The Twitter Bootstrap can be reached & downloaded from the Bootstrap official site : Bootstrap :

We'll use the NuGet Manager to install the Bootstrap:
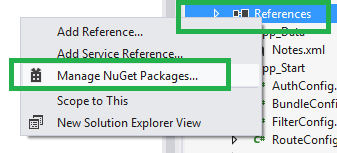
Make a search for "Bootstrap":

The manager will append CSS & JS files to your project :

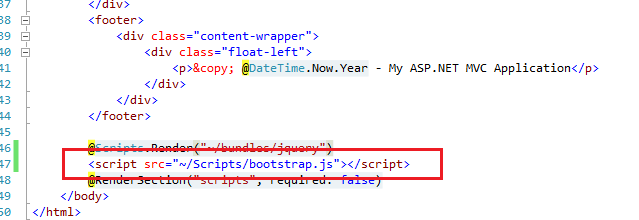
In order to use the Bootstrap in the web pages, we'll modify the _Layout file at the MVC Shared folder :

Essentially , that's all you need to use the Bootstrap. That's All!!!!
You can stop reading here.
But in case you want to add the Bootstrap NavBar to your website layout, you can keep reading the next explanations.
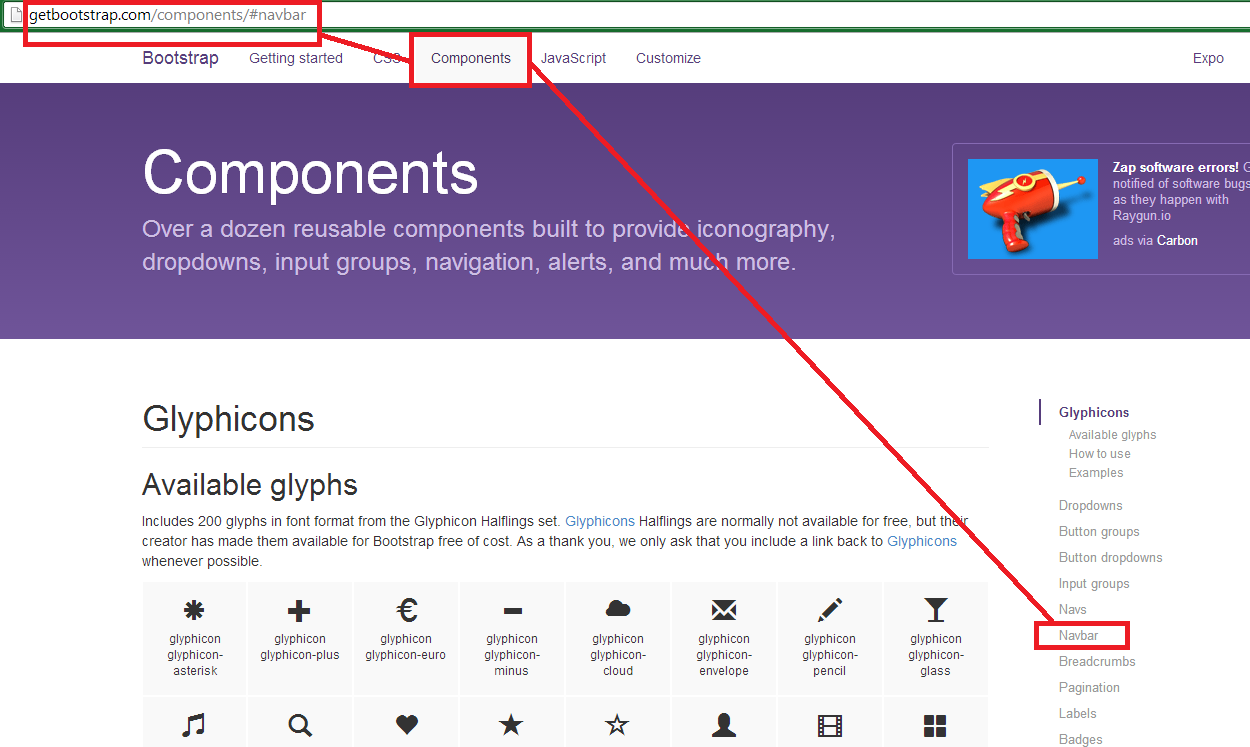
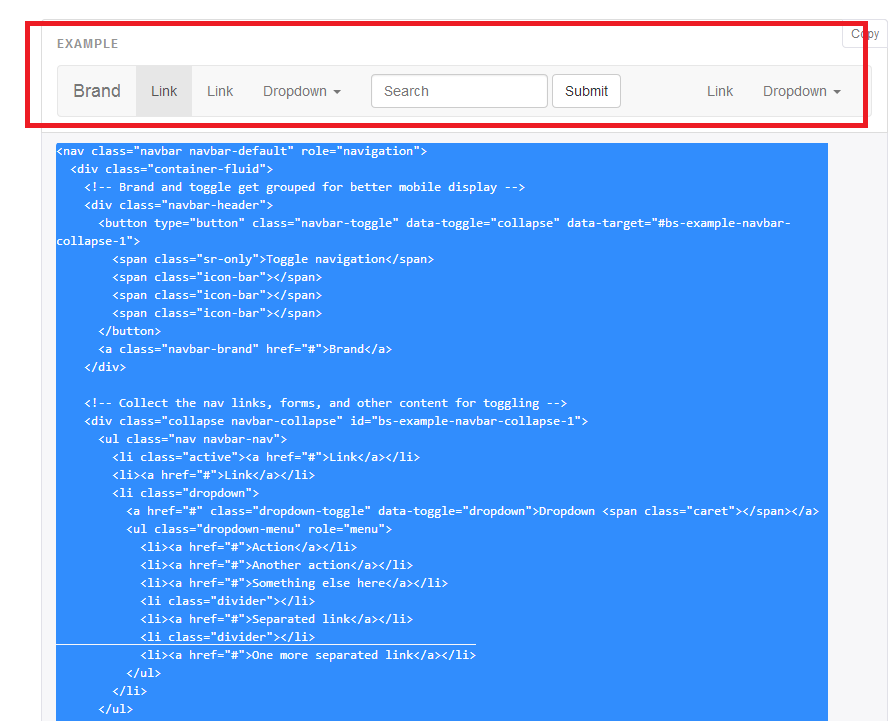
We'll add a NavBar at the _Layout file, therefore go to the Bootstrap web site:
Copy the <nav>, and return to the _Layout file:
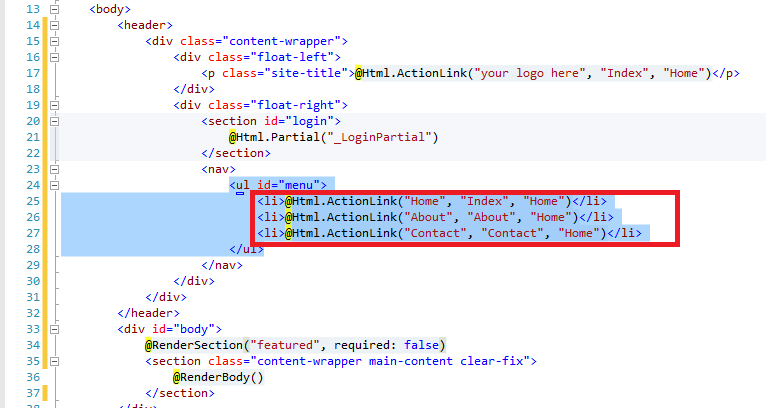
At the _Layout, take aside the Menu, because we'll use it afterwards:
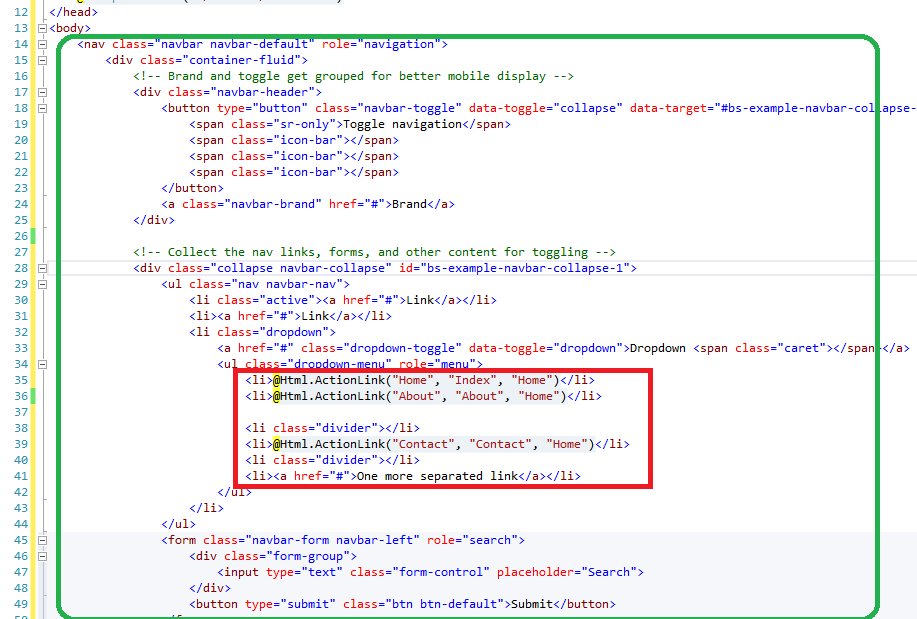
Then delete the whole <header> :

And paste the NavBar in place of that <Header>, updating the dropdown-menu with our Menu : :
Now find the "body" of the file:
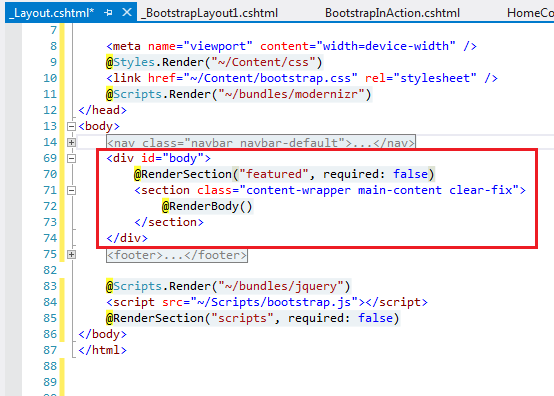
And replace the class for the "container" class :

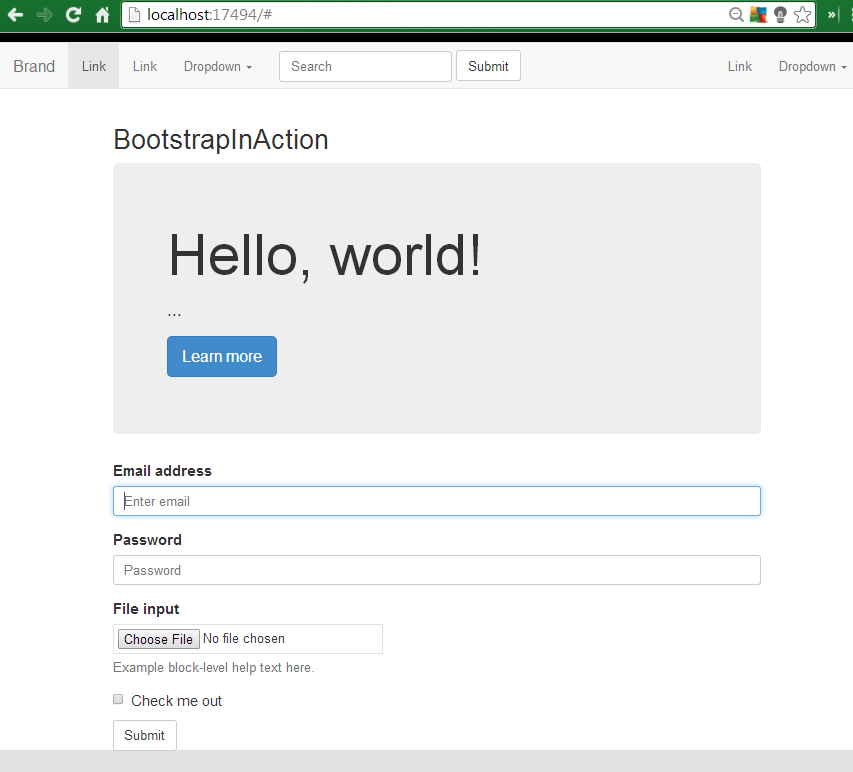
Rebuild & browse to the web page :

That's all!! In this tutorial we've learned how to add a Twitter Bootstrap NavBar to your Asp.Net MVC in 5 minutes.
Happy programming.......
כתב: כרמל שוורצמן
No comments:
Post a Comment