Sunday, December 27, 2015

Add the jQueryUI to your web site in 5 minutes

In this Step by step Add the jQueryUI to your web site in 5 minutes  post,  we see how to add the jQueryUI style and javascript to your web in 2 short steps.
This is how a web site using jQueryUI is displayed:


And this is how the site looks like in Nexus Galaxy devices :    


Add the jQueryUI to your web site in 5 minutes  

If you are in a hurry and need to add say a nice Calendar to your web, just take a look here at how to add the jQueryUI style and javascripts to your web in this 2 short steps:

1) download the jQueryUI
2) add only this 3 elements to your Web : 1 file CSS - 1 JS and the Images folder. (and discard all the  other files and folders)


1) Download the jQueryUI files:

Browse to  http://jqueryui.com/themeroller/    and select your favorite Theme : 


Click on "Download" and there click again on "Download" :


Save the .zip file somewhere and unzip it.

2) Add only this 3 elements to your Web:

Next, we select only the following 3 files :

 1) The file CSS : jquery-ui.css
 2) The JS file :    jquery-ui.js
 3) The Images folder   "images" :


Paste the files inside your web site project :


Then, import the links to the web page where you want to enable the jQuery components and style :


The style reference must be located in the <head> element.
The scripts will go by the end of the <body> tag, thus ensuring that all HTML5 elements were created , when the compiler will read the scripts.
However, be careful to :
1) referencing the file scripts before you start coding your own javascript code;
2) the "jquery-ui.js" script file must follow the jQuery code "jquery.js" (or "jquery-X.X.X.js") [where "X" is the current version]


That's all. The web site will be shown like this:


1- In Mobile devices : 


2- On Medium and Big desktops:


      by Carmel Schvartzman


כתב: כרמל שוורצמן

Friday, December 4, 2015

Bootstrap Tutorial Lesson 14 - Responsive Tabs with Scrollspy

In this Step by step Bootstrap Tutorial Lesson 14 - Responsive Tabs with Scrollspy  
 post,  we design in 15 minutes a responsive Bootstrap Tab with  Scrollspy , in a from-scratch Application for Mobile devices & desktop computers . All the code is open source at GitHub:
https://github.com/CarmelSoftware/Bootstrap_TabsAndScrollspy

This is how the Responsive Tabs with Scrollspy are displayed:


And this is the App in Nexus Galaxy devices :    


Bootstrap Tutorial Lesson 14 - Responsive Tabs with Scrollspy  

If you are in a hurry and need the Tabs with Scrollspy right now, download it from the following GitHub repository. Afterwards,  adapt it to your needs:
https://github.com/CarmelSoftware/Bootstrap_TabsAndScrollspy


You can begin building this app from a free Bootstrap template downloaded from  www.initializr.com/  (we explained this in a short tutorial: Bootstrap Templates). Elsewhere add to your HTML5 page the following CDN  jQuery and Bootstrap references   :


<meta name="viewport" content="width=device-width, initial-scale=1">
<link rel="stylesheet" href="https://maxcdn.bootstrapcdn.com/bootstrap/3.3.4/css/bootstrap.min.css">
<link rel="stylesheet" href="https://maxcdn.bootstrapcdn.com/bootstrap/3.3.4/css/bootstrap-theme.min.css">


...and the following scripts before closing the </body> element  :

<script src="//ajax.googleapis.com/ajax/libs/jquery/1.11.2/jquery.min.js"></script>  
<script src="https://maxcdn.bootstrapcdn.com/bootstrap/3.3.4/js/bootstrap.min.js"></script>

The latest versions of the Bootstrap files are in this CDN server: http://www.bootstrapcdn.com/

If you need a Mobile device Emulator, read this short tutorial on installing the FREE Ripple Emulator.


1) Designing a Responsive Tab:

Following, we give you all the code to create the Tabs: all this code you just copy-paste inside your page.
Let's start.
We begin by creating the Navbar which allows the user to open the corresponding tabs content . We do so by using the Bootstrap classes "nav nav-tabs"   , in order to set the menu :

<ul id="myTabs" class="nav nav-tabs">
                    <li class="active"><a href="#home" id="home-tab" data-toggle="tab" aria-controls="home" aria-expanded="true">Home</a></li>
                    <li><a href="#profile" id="profile-tab" data-toggle="tab" aria-controls="profile">Life</a></li>
                    <li class="dropdown">
                        <a href="#" id="myTabDrop1" class="dropdown-toggle" data-toggle="dropdown" aria-controls="myTabDrop1-contents">More <span class="caret"></span></a>
                        <ul class="dropdown-menu" aria-labelledby="myTabDrop1" id="myTabDrop1-contents">
                            <li><a href="#dropdown1" id="dropdown1-tab" data-toggle="tab" aria-controls="dropdown1">A friend</a></li>
                            <li><a href="#dropdown2" id="dropdown2-tab" data-toggle="tab" aria-controls="dropdown2">Happiness</a></li>
                        </ul>
                    </li>
                </ul>
                <br />

The buttons will open the corresponding "tab-pane fade" , such as the following :

<div class="tab-pane fade" id="dropdown2" aria-labelledby="dropdown2-tab">
                        <h3>Happiness</h3>
                        <img class="img-responsive img-rounded" src="..." alt="Alternate Text" />
                        <br />
                        <p>Men of the most vulgar type, seem to identify the Happiness with pleasure. (Etics, I ch V)</p>
                        <p>It is the mark of an educated mind to be able to entertain a thought without accepting it.</p>
                    </div>


All the Bootstrap Tabs documentation can be found in the GetBootstrap Web Site.


2) Designing a Scrollspy inside a Tab:

Next, we create another Tab content, containing a Scrollspy:


<div class="tab-pane fade" id="profile" aria-labelledby="profile-tab">

                        <div class="bs-example" data-example-id="embedded-scrollspy">
                            <nav id="navbar-example2" class="navbar navbar-default navbar-static">
                                <div class="container-fluid">
                                    <div class="navbar-header">
                                        <button class="navbar-toggle collapsed" type="button" 
                                            data-toggle="collapse" 
                                            data-target=".bs-example-js-navbar-scrollspy">
                                            <span class="sr-only">Toggle navigation</span>
                                            <span class="icon-bar"></span>
                                            <span class="icon-bar"></span>
                                            <span class="icon-bar"></span>
                                        </button>
                                        <a class="navbar-brand" href="#">Points Of View</a>
                                    </div>
                                    <div class="collapse navbar-collapse bs-example-js-navbar-scrollspy">
                                        <ul class="nav navbar-nav">
                                            <li><a href="#happy">A happy life</a></li>
                                            <li><a href="#Truth">Truth</a></li>
                                            <li class="dropdown">
                                                <a href="#" id="navbarDrop1" 
                                                    class="dropdown-toggle" data-toggle="dropdown" role="button" 
                                                    aria-haspopup="true" aria-expanded="false">More About Life <span class="caret"></span></a>
                                                <ul class="dropdown-menu" aria-labelledby="navbarDrop1">
                                                    <li><a href="#love">Love</a></li>
                                                    <li><a href="#privilege">Privilege</a></li>
                                                    <li role="separator" class="divider"></li>
                                                    <li><a href="#perspective">Perspective</a></li>
                                                </ul>
                                            </li>
                                        </ul>
                                    </div>
                                </div>
                            </nav>        

Every <a> button in the Nav will open the corresponding contents, and also, while you navigate from content to content, the corresponding menu will be outlined  .


Now for the Scrollspy:

 <div data-spy="scroll" data-target="#navbar-example2" data-offset="0" class="scrollspy-example">
                                <h4 id="happy">A happy life</h4>
                                <img class="img-responsive img-rounded" src="..." alt="Alternate Text" />
                                <br />
                                <p>Very little is needed to make a happy life</p>
                                ...
                                <h4 id="Truth">Truth</h4>
                                <img class="img-responsive img-rounded" src="..." alt="Alternate Text" />
                                <br />
                                <p>If someone is able to show me</p>
                                ...
                                <h4 id="love">Love</h4>
                                <img class="img-responsive img-rounded" src="..." alt="Alternate Text" />
                                <br />
                                <p>It is not death that a man should fear</p>
                                ...
                                <h4 id="privilege">Privilege</h4>
                                <img class="img-responsive img-rounded" src="..." alt="Alternate Text" />
                                <br />
                                <p>You need to avoid certain things in your train of thought</p>
                                ...
                                <h4 id="perspective">Perspective</h4>

                                <img class="img-responsive img-rounded" src="..." alt="Alternate Text" />
                                <br />
                                <p>Everything we hear</p>
                                ...
                            </div>
                </ul>
            </nav>

        </div>
    </header>


That's all. The entire Tab with Scrollspy will be shown like this:


1- In Mobile devices : 


2- On Medium and Big desktops:


This is the style for the App:

body {
    padding-top: 60px;
    padding-bottom: 20px;
}

.jumbotron h1 {
    
    color: #a8a3a3;
}

h2 {
    font: 900 18px Verdana;
    color: #a8a3a3;
}

.well p{
    font: 700 12px Verdana !important;    
    color: #a8a3a3;
}

.well-footer, .well-footer a {
    font: 900 10px Comic Sans MS;
    color: #a8a3a3;
}

.alert {
    font: 600 9px Verdana;
}

.centered {
    text-align: center;
}
.scrollspy-example {
    position: relative;
height:400px;
overflow-y:scroll;
}


      by Carmel Schvartzman


כתב: כרמל שוורצמן

Monday, October 26, 2015

MVC Ajax WebGrid with Administrator Buttons

This article is about an MVC Ajax WebGrid with Administrator Buttons and Sorting and Paging . 
  Here we see how to build an Ajax enabled WebGrid , which in case of an User Administrator will display management buttons (Edit - Delete) , and otherwise will not.

In case of an Administrator, the WebGrid will be displayed like this:

MVC Ajax WebGrid with Administrator Buttons


In case of a common User, the WebGrid will be displayed this way:
MVC Ajax WebGrid with Administrator Buttons


All the code in this tutorial , can be downloaded from the following GitHub repository:
https://github.com/CarmelSoftware/MVC_WebGrid_Admin

This is how this Administrator's Ajax WebGrid is shown in a Mobile Emulator :

MVC Ajax WebGrid with Administrator Buttons

In the case of a common User:

MVC Ajax WebGrid with Administrator Buttons


MVC Ajax WebGrid with Administrator Buttons


The whole code for creating this Ajax WebGrid with Management functionality , can be obtained from the following GitHub rep:
https://github.com/CarmelSoftware/MVC_WebGrid_Admin


Add the following markup  to the "Index" view:

@model IEnumerable<MyGrid_BL.Blog>

@{
    ViewBag.Title =  "Ajax WebGrid with Administrator Role Check";
    WebGrid grid = new WebGrid(Model, new[] { "Title", "Text", "DatePosted", "MainPicture", "Blogger" },
        rowsPerPage:2,ajaxUpdateContainerId:"GridDiv");

    IEnumerable<WebGridColumn> oColumns = new[] {

        grid.Column("ID",format:(item) =>  item.GetSelectLink(item.BlogID.ToString()) ) ,
        grid.Column("Title",format:@<a href='/Blog/Details/@item.BlogID'><b>@item.Title</b></a>),
        grid.Column("DatePosted","DatePosted", (item) => String.Format("{0:dd/MM/yyyy}", item.DatePosted != null ? item.DatePosted : DateTime.Now )),
        grid.Column("Picture",format:(item) =>
        { return new MvcHtmlString("<a href='/Blog/Details/" + item.BlogID +
            "'><img src='/Images/"+item.MainPicture+"' style='width:100px;height:100px;'></img></a>");
        })
    };

    if (User.IsInRole("Admin"))
    {
        oColumns = oColumns.Concat(new[] {grid.Column(
            format:@<div class="ActionsTH">
            @Html.ActionLink("Edit", "Edit", new { id=item.BlogID })<br />
            @Html.ActionLink("Details", "Details", new { id=item.BlogID })<br />
            @Html.ActionLink("Delete", "Delete", new { id=item.BlogID })
        </div>) });
    }
    
}

<h2>@ViewData["Title"]</h2>

<div id="GridDiv">
    @grid.GetHtml(tableStyle:"webgrid-tableStyle",headerStyle:"webgrid-headerStyle",footerStyle:"webgrid-footerStyle",alternatingRowStyle:"webgrid-alternatingRowStyle",columns: oColumns) </div>
<p style="text-align:center;">
     
    <input type="button"   value="Create New" onclick="javascript:location='/Blog/Create'" class="btn btn-default"/>
</p>


This code enable the Management Buttons on the Grid, only in case of a Power User such as an Administrator.

The code to set some User to the "Admin" Role, must be added to the "Acount" Controller, at the Register Action, and is as follows:

[HttpPost]
        [AllowAnonymous]
        [ValidateAntiForgeryToken]
        public ActionResult Register(RegisterModel model)
        {
            if (ModelState.IsValid)
            {
                // Attempt to register the user
                try
                {
                    if (!Roles.RoleExists("Admin"))
                    {
                        Roles.CreateRole("Admin");
                    }
                    WebSecurity.CreateUserAndAccount(model.UserName, model.Password);

                    string sAdmins = ConfigurationManager.AppSettings["Admins"];
                    string[] oAdmins = sAdmins.Split(';');

                    WebSecurity.Login(model.UserName, model.Password);

                    foreach (string sAdmin in oAdmins)
                    {
                        if (string.Compare(model.UserName, sAdmin) == 0
                                                &&
                            !Roles.IsUserInRole("Admin"))
                        {
                            Roles.AddUserToRole(model.UserName, "Admin");
                        }
                    }


                    return RedirectToAction("Index", "Home");
                }
                catch (MembershipCreateUserException e)
                {
                    ModelState.AddModelError("", ErrorCodeToString(e.StatusCode));
                }
            }

            // If we got this far, something failed, redisplay form
            return View(model);
        }

And these are the AppSettings to the Web.config file:


<appSettings>
    <add key="Admins" value="sa;sa1;sa2;sa3"/>
  </appSettings>

As you can see, we also reference a "~/Content/WebGrid.css" file:


body {
    background: #f7f3de url("images/ui-bg_fine-grain_15_f7f3de_60x60.png") 50% 50% repeat;
}

.webgrid-tableStyle {
    font: italic 11px Verdana;
    width: 100%;
    display: grid;
    border-collapse: separate;
    border: solid 1px #98BF21;
    background: #f8f7f6 url("images/ui-bg_fine-grain_10_f8f7f6_60x60.png") 50% 50% repeat;
    padding: 5px 5px 5px 5px;
    text-align: center;
    border-radius:10px;
}

.webgrid-headerStyle th {
    width: 250px;    
    background: #c67f1c url("images/ui-bg_fine-grain_10_eceadf_60x60.png") 50% 50% repeat;
    color: #FFFFFF !important;
    font: 900 14px Verdana !important;
    padding: 5px 5px 5px 5px;
    text-align: center;
    height:50px;
}

.ActionsTH {    
    background: #eceadf url("images/ui-bg_fine-grain_10_eceadf_60x60.png") 50% 50% repeat;
    color: #FFFFFF !important;
    font: 900 14px Verdana !important;
    padding: 5px 5px 5px 5px;
    text-align: center;
    width: 180px;
}

.webgrid-footerStyle, .webgrid-footerStyle a {
    background:#c67f1c url("images/ui-bg_fine-grain_10_eceadf_60x60.png") 50% 50% repeat;
    color: #FFF;
    font: 900 14px Verdana;
    padding: 3px 3px 3px 3px;
    height:50px;
}

.webgrid-alternatingRowStyle {
    background: #f8f7f6 url("images/ui-bg_fine-grain_10_f8f7f6_60x60.png") 50% 50% repeat;
    padding: 5px 5px 5px 5px;
}

.title-column {
    font: 900 13px Verdana;
    text-align: center;
}

.webgrid-img {
    width: 150px;
    height: 150px;
}

.webgrid-tableStyle a {
    text-decoration: none;
    color: #808080;
}
select {
      width: 200px;
    }


Important:
If you do not see the Ajax working  , it can be because some jQuery scripts are missing.
Just cut the jQuery.js file from the _Layout file to the <head> tag :
    @Scripts.Render("~/bundles/jquery")
    @Scripts.Render("~/bundles/jqueryui")
</head>


To install a Mobile Emulator, take a look at this tutorial on installing the FREE Ripple Emulator.


That's all. Our Administrator WebGrid will be displayed this way:

MVC Ajax WebGrid with Administrator Buttons

MVC Ajax WebGrid with Administrator Buttons


      by Carmel Schvartzman


כתב: כרמל שוורצמן


Tuesday, September 8, 2015

Bootstrap Tutorial Lesson 13 - Responsive MegaNavbars

In this Step by step Bootstrap Tutorial Lesson 13 - Responsive MegaNavbars 
 post,  we design in 15 minutes a responsive Bootstrap MegaNavbar with several kinds of components like Tables, Lists, buttons, Carousel, Search form, and more, shown in different formats, in a from-scratch Application for Mobile & desktop computers . All the code is open source at GitHub:
 https://github.com/CarmelSoftware/Bootstrap_MegaNavbars
This is how the MegaNavbars are displayed:

 Bootstrap Tutorial Lesson 13 - Responsive MegaNavbars

 Tutorial Lesson 13 - Responsive MegaNavbars

And this is the App in Nexus Galaxy devices :    

 Bootstrap  Lesson 13 - Responsive MegaNavbars


Bootstrap Tutorial Lesson 13 - Responsive MegaNavbars 

If you are in a hurry and need the MegaNavbar  right now, download it from the following GitHub repository, then customize it to your needs:
https://github.com/CarmelSoftware/Bootstrap_MegaNavbars


You can start building from a free Bootstrap template from  www.initializr.com/  (as explained in this short tutorial: Bootstrap Templates
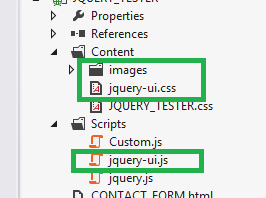
). Elsewhere add to your HTML5 page the following jQuery and Bootstrap references   :


<meta name="viewport" content="width=device-width, initial-scale=1">
<link rel="stylesheet" href="https://maxcdn.bootstrapcdn.com/bootstrap/3.3.4/css/bootstrap.min.css">
<link rel="stylesheet" href="https://maxcdn.bootstrapcdn.com/bootstrap/3.3.4/css/bootstrap-theme.min.css">


...and the following scripts before closing the </body> element  :

<script src="//ajax.googleapis.com/ajax/libs/jquery/1.11.2/jquery.min.js"></script>  
<script src="https://maxcdn.bootstrapcdn.com/bootstrap/3.3.4/js/bootstrap.min.js"></script>


If you need a Mobile device Emulator, read this short tutorial on installing the FREE Ripple Emulator.


1) Designing a first MegaNavbar collapsible Menu:

Following, we give you all the code to create the MegaNavbar: all this code you just copy-paste inside your page, chaining the code IN GREEN , chunk after chunk, then customizing it to your needs.
Let's start.
We begin by creating the containing Navbar . We do so by using the Bootstrap classes "navbar navbar-default navbar-fixed-top" and "navbar-header" , in order to set the classic Mobile menu button:

 <header class="navbar navbar-default navbar-fixed-top" role="navigation">
        <div class="container">
            <div class="navbar-header">
                <button type="button" class="navbar-toggle collapsed"
                    data-toggle="collapse" data-target=".my-navbar-collapse"
                    aria-expanded="false" aria-controls="navbar">
                    <span class="sr-only">Toggle navigation</span>
                    <span class="icon-bar"></span>
                    <span class="icon-bar"></span>
                    <span class="icon-bar"></span>
                </button>
                <a class="navbar-brand" href="#">Bootstrap Advanced Navbars</a>
            </div>

The button will open the collapsible "navbar-collapse collapse" . Inside it, the navbar-bar will include the following button to open a dropdown-menu:

<ul class="nav navbar-nav">
                    <li class="dropdown custom-dropdown">
                        <a class="dropdown-toggle" data-toggle="dropdown" href="#">Rich Controls  <span class="caret"></span></a>
                        <ul class="dropdown-menu custom-dropdown-menu1 row">


a ) Carousel:

Inside the menu, we first create a Carousel as follows:

<li class="col-xs-12 col-sm-5 col-lg-3">
                                <div id="carousel-example-generic" class="carousel slide carousel-custom" data-ride="carousel">
                                    <div class="carousel-inner">
                                        <div class="item active">
                                            <img src="http://www.stockvault.net/data/2011/02/23/118137/small.jpg" alt="..." />
                                            <div class="carousel-caption">
                                                <h3>jQuery Mobile</h3>
                                                <p>jQueryMobilePlugins</p>
                                            </div>
                                        </div>
                                        <div class="item">
                                            <img src="http://www.stockvault.net/data/2011/02/24/118148/small.jpg" alt="..." />
                                            <div class="carousel-caption">
                                                <h3>Bootstrap</h3>
                                                <p>Bootstrap Plugins</p>
                                            </div>
                                        </div>
                                        <div class="item">
                                            <img src="http://www.stockvault.net/data/2011/05/31/124348/small.jpg" alt="..." />
                                            <div class="carousel-caption">
                                                <h3>HTML5</h3>
                                                <p>HTML5 Mobile Apps</p>
                                            </div>
                                        </div>
                                    </div>
                                </div>
                                <h5>Bootstrap Front End</h5>
                                <p class="nav-text">
                                    Bootstrap makes front-end web development faster and easier. 
                                    It's made for folks of all skill levels, devices of all shapes, and projects of all sizes.
                                </p>
                                
                            </li>


b ) Buttons:

Now we add link buttons:

<li class="col-xs-12  col-sm-7 col-lg-4">
                                <a href="http://carmelsoft.blogspot.com" class="btn btn-block btn-custom">CarmelSoft Mobile Plugins</a>

                                <a class="btn btn-block btn-custom" href="https://github.com/CarmelSoftware">CarmelSoftware GitHub</a>

                                <a class="btn btn-block btn-custom" href="http://themvcclub.blogspot.com">The MVC Club</a>

                                <a class="btn btn-block btn-custom" href="http://www.getbootstrap.com">Get Bootstrap </a>

                                <a class="btn btn-block btn-custom" href="http://www.jquery.com">Get jQuery</a>

                            </li>

c ) List :

We also add to the MegaNavbar a list group:


<li class="col-xs-12  col-sm-12 col-lg-5">

                                <div class="list-group">
                                    <a href="https://github.com/CarmelSoftware" class="list-group-item active">CarmelSoftware GitHub
                                    </a><a href="http://carmelsoft.blogspot.com" class="list-group-item">CarmelSoft Mobile Plugins</a>
                                    <a href="http://themvcclub.blogspot.com" class="list-group-item">The MVC Club</a>

                                    <a href="http://www.getbootstrap.com" class="list-group-item">Get Bootstrap</a>
                                    <a href="http://www.jquery.com" class="list-group-item">Get jQuery</a>
                                </div>
                            </li>
                        </ul>
                    </li>

                </ul>

That's all. The first Menu is done. Just add the CSS3 style (at the end of this post) to display it correctly:
 Bootstrap Tutorial  - Responsive MegaNavbars


 Bootstrap Tutorial Lesson 13 -  MegaNavbars


All the Bootstrap Navbar documentation can be found in the GetBootstrap Web Site.

2) Designing a second MegaNavbar dropdown Menu:

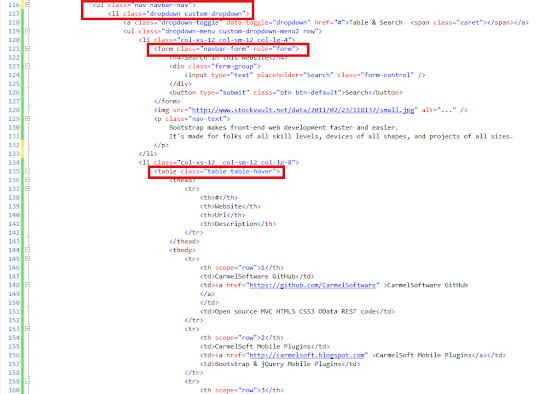
Next, we create another Navbar menu, containing a Table and a Form. Add the following menu:

 <ul class="nav navbar-nav">
                    <li class="dropdown custom-dropdown">
                        <a class="dropdown-toggle" data-toggle="dropdown" href="#">Table & Search  <span class="caret"></span></a>
                        <ul class="dropdown-menu custom-dropdown-menu2 row">

Inside it, add the Search Form:

<li class="col-xs-12 col-sm-12 col-lg-4">
                                <form class="navbar-form" role="form">
                                    <h4>Search in this Website</h4>
                                    <div class="form-group">
                                        <input type="text" placeholder="Search" class="form-control" />
                                    </div>
                                    <button type="submit" class="btn btn-default">Search</button>
                                </form>
                                <img src="http://www.stockvault.net/data/2011/02/23/118137/small.jpg" alt="..." />
                                <p class="nav-text">
                                    Bootstrap makes front-end web development faster and easier. 
                                    It's made for folks of all skill levels, devices of all shapes, and projects of all sizes.
                                </p>                                
                            </li>        

We enhanced this column with an image and some text.
Now for the Table:

 <li class="col-xs-12  col-sm-12 col-lg-8">                                                                
                                <table class="table table-hover">
                                    <thead>
                                        <tr>
                                            <th>#</th>
                                            <th>Website</th>
                                            <th>Url</th>
                                            <th>Description</th>
                                        </tr>
                                    </thead>
                                    <tbody>
                                        <tr>
                                            <th scope="row">1</th>
                                            <td>CarmelSoftware GitHub</td>
                                            <td><a href="https://github.com/CarmelSoftware" >CarmelSoftware GitHub
                                            </a>
                                            </td>
                                            <td>Open source MVC HTML5 CSS3 OData REST code</td>
                                        </tr>
                                        <tr>
                                            <th scope="row">2</th>
                                            <td>CarmelSoft Mobile Plugins</td>
                                            <td><a href="http://carmelsoft.blogspot.com" >CarmelSoft Mobile Plugins</a></td>
                                            <td>Bootstrap & jQuery Mobile Plugins</td>
                                        </tr>
                                        <tr>
                                            <th scope="row">3</th>
                                            <td>The MVC Club</td>
                                            <td><a href="http://themvcclub.blogspot.com" >The MVC Club</a></td>
                                            <td>MVC HTML5 CSS3 OData REST</td>
                                        </tr>
                                        <tr>
                                            <th scope="row">4</th>
                                            <td>GetBootstrap.com</td>
                                            <td><a href="http://www.getbootstrap.com" >www.getbootstrap.com</a></td>
                                            <td>Get Bootstrap</td>
                                        </tr>
                                        <tr>
                                            <th scope="row">5</th>
                                            <td>jQuery.com</td>
                                            <td><a href="http://www.jquery.com" >www.jquery.com</a></td>
                                            <td>Get jQuery</td>
                                        </tr>
                                    </tbody>
                                </table>
                            </li>
                        </ul>
                    </li>

                </ul>
            </nav>

        </div>
    </header>

 Bootstrap Tutorial Lesson 13 - Responsive

That's all. The entire MegaNavbar will be shown like this:


1- In Mobile devices : 

 Lesson 13 - Responsive MegaNavbars

 Bootstrap - Responsive MegaNavbars

 Bootstrap Tutorial Lesson 13 -

  Tutorial Lesson 13 - Responsive MegaNavbars

 Lesson 13 - Responsive MegaNavbars

  Responsive MegaNavbars


2- On Medium and Big desktops:


 MegaNavbars

 Bootstrap Tutorial Lesson 13

 Bootstrap Tutorial Lesson

 Bootstrap Tutorial


This is the style for the App:

body {
    padding-top: 50px;
    padding-bottom: 20px;
}

.jumbotron h1 {
    font: 900 25px Verdana;
    color: #a8a3a3;
}

h2 {
    font: 900 18px Verdana;
    color: #a8a3a3;
}

.well {
    font: 900 12px Comic Sans MS;
    color: #a8a3a3;
}

.well-footer, .well-footer a {
    margin-top:130px;
    font: 900 10px Comic Sans MS;
    color: #a8a3a3;
}

.alert {
    font: 600 9px Verdana;
}

.centered {
    text-align: center;
}

.navbar-nav > li > .dropdown-menu {
    margin-top: 15px;margin-left:10px;
    border-top-left-radius: 10px;
    border-top-right-radius: 10px;
    border-bottom-left-radius: 0px;
    border-bottom-right-radius: 0px;
}

.custom-dropdown {
    position: static !important;
    width: 100%;
}


.nav-text {
    text-align: justify;
    font: 800 11px verdana;
}

.btn-custom {
    font: 900 12px verdana;
    text-shadow: -1px -1px 0px #fff;
    background-color: #f0f0f0;
    margin: 11px 21px 21px 0px;
    padding: 20px;
    border: 1px solid #c0c0c0;
    border-radius: 5px;
    box-shadow: 10px 10px #a0a0a0;
}

.custom-dropdown-menu1:before {
    border-bottom: 15px solid #fff;
    border-right: 17px solid transparent;
    border-left: 17px solid transparent;
    position: absolute;
    top: -15px;
    left: 38%;
    z-index: 10;
}

.custom-dropdown-menu1:after {
    border-bottom: 17px solid #FFF;
    border-right: 19px solid transparent;
    border-left: 19px solid transparent;
    position: absolute;
    top: -15px;
    left: 38%;
    z-index: 8;
}
.custom-dropdown-menu2 {
    margin: 20px;
    padding: 15px 15px;
    width: 70%;
    box-shadow: 2px;
}
.custom-dropdown-menu2:before {
    border-bottom: 15px solid #fff;
    border-right: 17px solid transparent;
    border-left: 17px solid transparent;
    position: absolute;
    top: -15px;
    left: 58%;
    z-index: 10;
}

.custom-dropdown-menu2:after {
    border-bottom: 17px solid #fff;
    border-right: 19px solid transparent;
    border-left: 19px solid transparent;
    position: absolute;
    top: -17px;
    left: 58%;
    z-index: 8;
}


      by Carmel Schvartzman


כתב: כרמל שוורצמן